Mastering Roof Navigation: A Comprehensive Guide
January 28, 2025
Walking on a Roof Safely – Tips to Avoid Damage (and Injury)

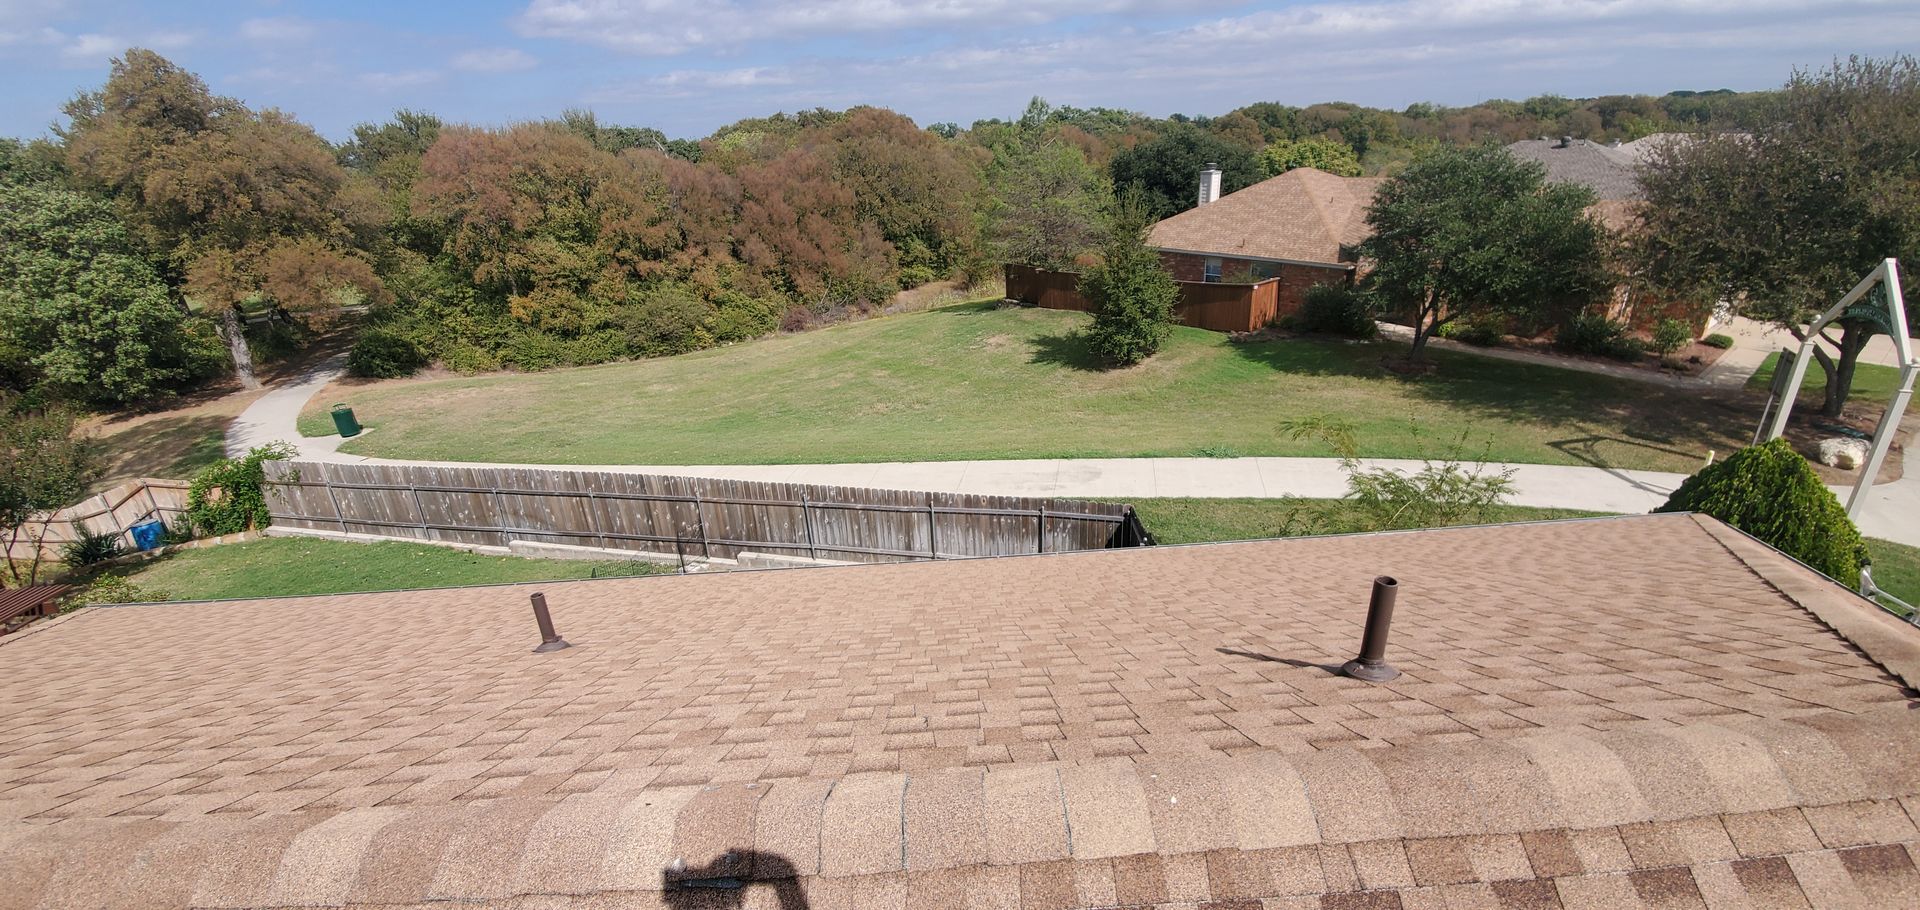
Whether you’re a homeowner trying to hang holiday lights or a maintenance worker inspecting a roof, knowing how to walk on a roof safely is crucial. Not only do you want to avoid falling off and injuring yourself, but improper walking can also damage the roofing materials under your feet. Different roof types require different techniques – walking on asphalt shingles is not the same as on Spanish tile or a metal seam roof. In this guide, we’ll cover general roof-walking safety tips and material-specific advice so you can traverse your roof with confidence without harming either yourself or the roof.
1. Preparation: Safety First (Weather & Gear): Before even stepping foot on the roof, make sure conditions are appropriate. Choose a day with clear, dry weather – never attempt to walk a roof that is wet, icy, or covered in dew (early morning) as it will be extremely slippery. Here in Arlington we have many sunny days, so wait for one if possible. Avoid very windy days too; a sudden gust can throw you off balance. Next, wear the right footwear: soft rubber-soled shoes or boots with good tread are ideal. The soft rubber provides grip on shingles or metal and also is less likely to scuff or crack the roof surface compared to hard soles. Specialized “roofing shoes” exist, but a pair of clean sneakers or work boots with rubber soles works well. Ensure they are clean – tiny pebbles stuck in your sole can scratch shingles or membranes, so rinse them off if needed. Also, dress in comfortable clothing that isn’t too loose (you don’t want fabric catching on things). Always have essential safety gear: if the roof is steep or you’re not entirely confident, use a safety harness with a roof anchor and rope. It’s a life-saving device in case of a slip. In professional settings, OSHA often requires them. For homeowners, it may seem overkill, but on a steep two-story roof it’s wise. At minimum, have a spotter or buddy – someone on the ground or at the ladder holding it, and ideally another person on the roof to assist, especially if you’re carrying tools. Last tip: set up your ladder correctly. Use a stable extension ladder that extends at least 3 feet above the roof edge for easy on/off access. Secure it at the base (have someone foot it) and, if possible, tie or bungee it to a gutter or anchor at the top so it can’t slide. Many roof accidents happen not from falling off the roof, but from the ladder sliding away when trying to climb down. Prepare smart, and you’ve mitigated a lot of risk before you even start the roof walk.
2. Understand Your Roof’s Material and Condition: Different roofing materials have different weight-bearing capacities and fragilities. Asphalt Shingles: These are the most forgiving to walk on. They have a gritty surface that provides decent traction, like sandpaper. When walking on shingles, distribute your weight (more on that in the next section) and avoid kicking or scraping your feet, as that can dislodge the protective granules. Granule loss can shorten the shingle’s life. Also, be mindful of very hot days – asphalt gets softer in high heat; walking on a 100°F day might scuff or even embed your footmarks in the shingles. If you must do it in heat, go early morning or evening when the shingles are cooler. Metal Roofs: These can be slippery, especially if there’s any moisture or dust. Take slow, deliberate steps. It’s recommended to wear shoes with softer rubber and possibly even roofing shoe covers (some pros use foam pads or cougar paw boots for traction on metal). On a standing seam metal roof, try to step on the flats midway between seams or on/near the seams if they’re structurally supported – stepping in the middle of a flat panel can sometimes dent thinner metal. Tile Roofs (Clay/Concrete): Extreme caution needed! Clay and concrete tiles can crack under point load. These roofs are not really designed to be walked on much. If you must, step where the tiles overlap and are supported – usually lower third of the tile, where it lies over the tile below it, which has more support underneath. Distribute weight over arched tiles by stepping on the peaks, not in the valleys of the curves, and as evenly as possible over multiple tiles at once. It helps to wear soft-soled shoes and even knee pads – crawling on all fours can spread weight. Better yet, use a roof ladder or walk boards (planks that lay across multiple tiles) to distribute weight. Many roofing companies will lay foam pads or plywood sheets on tile roofs to crawl on, to avoid direct pressure. If you have an older tile roof, assume some tiles might be brittle – consider hiring a pro instead of walking it yourself. Wood Shakes/Shingles: These can be a bit uneven and sometimes slippery if there’s moss. They generally hold a person’s weight fine, but avoid stepping on very edge of a shake as it could split. Use rubber soles for grip and be aware that old dry wood can be slick like metal. Flat Membrane Roofs (EPDM, TPO, etc.): These can typically handle foot traffic (especially if they have a walkway pad), but one big rule: check for and avoid stepping on any blisters or soft spots in the membrane – you could burst them. And avoid wearing anything that could puncture (no sharp tools exposed, etc.). For any roof: try to walk on the areas supported by structural elements (like near trusses or rafters). On an older house, you can often tell these by lines of nails or slight depressions. For example, walking along the rafters (often 16” or 24” apart) gives more support – a trick is to look from inside the attic to see rafter lines, then translate that to roof surface. Finally, assess the roof’s condition: if it’s clearly in poor shape (sagging areas, lots of broken shingles), minimize walking or use boards to spread out your weight.
3. Walking Technique – Slow and Low: When you step onto the roof, keep your center of gravity low. This might mean slightly crouching or at least not standing fully upright if it’s steep. Bend your knees a bit and spread your feet slightly turned out for stability. On steeper pitches, you may actually want to crawl on hands and knees or at least keep one hand on the roof as you move (wearing knee pads and gloves helps). Take it slow and deliberate – no sudden movements or running around. If you feel unsure, sit down or get on all fours for better grip. Use the “three-point rule”: always have three points of contact (e.g. two feet and one hand, or two hands and one foot) on the roof. As you move, distribute your weight as evenly as possible. Walk flat-footed, on the balls of your feet, not on your heels. The ball (forefoot) helps maintain more contact area and grip, and it reduces scuffing. On shingles, stepping on your heels can pry up shingle edges – avoid digging in your heels. On metal or tiles, a flat foot gives more traction and spreads weight. Keep your steps short and controlled. If the roof is moderately pitched, walk across the slope, not straight down or up, when you can – kind of like traversing a mountain. This gives you a shorter effective slope under each foot. If you need to go down, you can also sort of side-step downward or go down on your butt (scooting) for safety while doing any work. Always face the roof when descending (i.e., like climbing down a ladder, face the ladder/roof). If you start slipping, don’t panic: use whatever friction you can (sit down or grab a ridge). On the topic of ridges, contrary to instinct, do not walk right on the ridge or hips if they have special ridge cap shingles or tiles – these caps are often more fragile or not meant to bear weight. Instead, step just below the ridge on the main field shingles or panels. One more tip: avoid stepping on flashing and vents – they can be slick metal and also you don’t want to loosen them. Step on the roofing material itself. And obviously, avoid stepping on skylight glass or plastic domes (sounds silly, but people have done it!). The overarching idea is to stay balanced, move in a deliberate way, and keep your weight distributed.
4. Using Roofing Ladders and Walk Boards for Steep or Delicate Roofs: If your roof is very steep (let’s say over 6/12 pitch) or made of easily damaged material, it’s wise to employ additional equipment. Roof ladders are ladders designed to hook over the ridge of a pitched roof, providing a stable platform to climb on without actually touching the roof with your feet. They’re great for painting or inspecting a steep roof without pressing on the shingles or tiles – you effectively transfer weight to the ridge (which usually sits on sturdy framing) and the ladder bears your weight. Similarly, you can use roof jacks and planks: roof jacks are metal brackets you nail temporarily into the roof (under a shingle, through the decking), then you insert a sturdy plank (like a 2x10 board) into them, creating a mini scaffold or platform to stand on. These are extremely helpful for working on steep roofs – think of a roofer nailing shingles; they often use roof jack scaffolds. If you’re doing a repair or inspection, a couple of roof jacks and a board can make it safer and prevent you from stomping directly on the roof surface. Just be sure you install them correctly (nail into rafters if possible, and remove and seal the nail holes afterward). For fragile roofs like slate or tile, using foam padding or a pigeon-toed crawl (stepping only where supported) might not be enough for someone inexperienced – strongly consider hiring a professional for those. They sometimes use cat ladders or create temporary plywood pathways to spread weight. The cost of a pro is small compared to breaking a bunch of expensive tiles (or breaking your bones). But if you’re determined, definitely use pads, and move very gently.
5. Know When to Call the Pros: This is part of walking safely – knowing your limits. Some roofs are just plain unsafe for untrained people without proper gear (e.g., a 12/12 pitch two-story Victorian with slate – do not go up there on your own!). Also, consider the condition: if your roof is old and possibly structurally unsound (sagging significantly, or a lot of rot suspected), it may not even safely support you. If you sense soft spots underfoot (common if decking is rotted), retreat and call a professional. They’ll have the equipment (like infrared scanners to find rot, or the ability to step only on framing members). Another scenario: you find the task you went up for is more complicated or hazardous than you thought – e.g., you went to clean gutters but realize the far side is extremely hard to reach without overextending or climbing on a slippery dormer. At that point, climbing further could risk a fall or damage. Better to climb down and re-evaluate (maybe get a harness or hire someone). Many roofing companies, like Texas Republic Roofing in Arlington, will gladly perform inspections or minor fixes for you – saving you the danger. In fact, professional roofers are trained in walking and often wear safety gear, as roofing is one of the most hazardous jobs (with a high fatality rate largely due to falls). So don’t feel bad if you decide it’s above your comfort level – that’s a smart decision.
Bonus: Protecting the Roof While Working: If your aim of walking on the roof is to accomplish a task (say, repairing a vent or cleaning moss), consider taking measures to protect the roof during that process. Use a bucket and rope to haul tools up rather than carrying heavy, sharp tools while walking (you need your hands free to balance). Lay down a foam pad or piece of plywood where you’ll be doing work to kneel/stand on – this prevents concentrated pressure or dropped tools from gouging the roof. For example, if you’re replacing a few shingles, you could put a piece of plywood on top of nearby shingles to sit or set your hammer on (just don’t leave it too long to bake in the sun). Sweep off grit or debris before stepping in an area – small rocks can act like ball bearings under your feet and like sandpaper on the roof.
In summary, walking on a roof safely is all about careful planning, understanding your roof’s material, and using proper technique. By following these tips – choosing a dry day, wearing rubber-soled shoes, moving slowly with weight distributed, and employing ladders or planks for tricky roofs – you’ll greatly reduce the risk of slips and avoid causing damage to the roof itself. Always prioritize safety: a split-second fall can be life-changing, so never be overconfident on a roof. When in doubt, call in a professional who has the equipment and know-how. Remember, a well-maintained roof should rarely need foot traffic beyond inspections or occasional fixes. If you treat it gently the few times you go up, it will continue protecting you and your home unscathed. Stay safe out there!
North Texas weather can be notoriously harsh on roofs. Hailstorms, blistering heat, high humidity, and fierce winds during storm season all test the durability of a home’s roof. As a local roofing company in Arlington TX, Texas Republic Roofing knows that choosing the right roofing material is essential to protect your home and maximize its longevity. Homeowners should consider how each common roofing material – from asphalt shingles to slate tiles – performs under these conditions. Below, we examine each option’s durability, lifespan, cost-effectiveness, aesthetics, and suitability for our climate. North Texas Climate Challenges for Roofs North Texas experiences extreme weather that directly impacts roofing. Every year, Texas leads the nation in severe hail events – 706 hailstorms were recorded in early 2024 alone – resulting in over a billion dollars in roof damage annually. In spring and early summer, intense thunderstorms can bring hailstones the size of golf balls (or larger) and wind gusts well above 70–80 mph, occasionally even tornado-strength. Roof materials here must therefore withstand high-impact hits and resist wind uplift during these violent storms. Summers in Arlington are equally challenging. Daytime temperatures often soar into triple digits, and the surface of a roof can reach over 150°F in the Texas sun. Prolonged UV exposure and heat can accelerate wear on certain roofing materials. High humidity and heavy downpours are common as well, which means roofs need to shed torrential rain and resist moisture-related issues (like rot or mold). In short, North Texas roofs require materials that can handle intense hail, thermal stress from extreme heat, sudden temperature swings, strong winds, and heavy rain – all while protecting your home year-round. Asphalt Shingles: Affordable and Adaptable Asphalt shingles are the most popular residential roofing material in Texas and across the U.S., largely due to their affordability and versatility. They come in a wide range of colors and styles, allowing homeowners to match any architectural look. A typical asphalt shingle roof lasts around 20 years before needing replacement – a shorter lifespan than some premium materials, but a reasonable trade-off given the low upfront cost. Modern “architectural” asphalt shingles (also called dimensional shingles) offer better thickness and durability than older 3-tab shingles, and they provide decent fire resistance. Asphalt is relatively lightweight and easy for contractors to install or repair, which keeps maintenance costs down. In the context of aesthetics and budget, asphalt shingles offer a balanced solution for many Arlington homeowners looking for a cost-effective roof. From a climate perspective, asphalt shingles perform fairly well but do have some vulnerabilities. On the plus side, they feature mineral granules on the surface that help reflect sunlight and shield the asphalt from UV rays – an important feature under the brutal Texas sun. These reflective granules can slightly reduce heat absorption, helping keep attic temperatures lower in summer. Asphalt shingles are also engineered to endure typical wind loads; quality laminated shingles can be rated to resist winds of 110 mph or higher when properly installed. However, in extreme wind events (such as tornadoes or severe thunderstorms), shingles can still loosen or tear off – especially if they are aging or if installation was subpar. Hail is another concern. New asphalt shingles in good condition can withstand small to medium hail without immediate failure, and impact-resistant (Class 4) asphalt shingles are available that incorporate rubber-like polymers for extra durability. These Class 4 shingles are designed to reduce hail damage by absorbing impacts. That said, standard asphalt roofs may lose protective granules when struck by large hail, compromising their ability to resist UV and water over time. As asphalt shingles age and weather, they become more brittle, making them increasingly susceptible to damage from even modest hailstones. In North Texas, it’s not uncommon for a major hailstorm to necessitate sections of an asphalt-shingle roof being repaired or replaced. Overall, asphalt shingles are adaptable and budget-friendly, but homeowners should be prepared for periodic maintenance or replacement in our climate – especially if the roof is over a decade old or if a catastrophic hailstorm hits. Metal Roofing: Longevity and Energy Efficiency Metal roofing has surged in popularity in North Texas for its exceptional durability and performance. A properly installed metal roof (whether standing-seam panels or metal shingles) can easily last 40 to 70 years, outlasting multiple generations of asphalt shingles. Metal is an inherently tough material that doesn’t crack or rot, and modern metal roofing panels are often coated with alloys (like Galvalume) to prevent rust in high humidity or rain. This makes metal roofs highly long-lived and relatively low maintenance. Although the upfront cost is higher, many homeowners see it as a worthwhile investment – especially if they plan to stay in their home long-term. In terms of aesthetics, metal roofs come in various styles and colors. Standing seam metal, with its sleek vertical seams, is popular for a contemporary look, while stone-coated steel shingles can mimic the appearance of traditional shingles or tiles. This gives homeowners plenty of design flexibility without sacrificing performance. Crucially, metal roofing excels under North Texas climate conditions. It is one of the most wind-resistant roofing options available – metal panels are typically rated for high winds and, when properly fastened, they hold up in intense storms that might peel up other materials. In fact, many metal roofs are warrantied to withstand 120+ mph winds, and they meet strict hurricane-zone building codes for uplift resistance. Hail resistance is another big advantage. Metal’s strength and slight flexibility allow it to absorb hail impacts that would crack rigid materials. A heavy hailstorm might cosmetically dent a metal roof, but it rarely compromises the roof’s structural integrity or weatherproofing. Even more, some metal products – for example, stone-coated steel roofing – carry the highest Class 4 impact rating, meaning they can withstand simulated hailstones up to 2″ in diameter without fracturing. This level of hail protection is a major plus in our hail-prone region. In terms of energy efficiency, metal is outstanding in hot climates: it naturally reflects a large portion of the sun’s radiant heat rather than absorbing it. Many metal roofs have reflective coatings or cool-roof paint finishes that further reduce heat gain, keeping your attic and home cooler. Metal also cools down quickly at night, unlike asphalt which can hold heat. Homeowners often find that a metal roof can noticeably reduce cooling costs in the summer. Additionally, metal is completely fireproof – an added safety bonus. The main downsides to consider are the higher upfront cost and the potential for noise during heavy rain or hail (which can be mitigated with proper underlayment and attic insulation). All things considered, metal roofing is extremely climate-resilient for North Texas homes – offering longevity, strength in storms, and energy savings during our brutal summers. Clay and Concrete Tiles: Classic Look, Heavy-Duty Performance Clay tile and concrete tile roofing have been used for centuries in hot climates, and they remain a premium choice in North Texas for those seeking a blend of beauty and durability. These roofs are most commonly seen in Mediterranean, Spanish, or mission-style architecture, featuring the distinctive curved (wave-like) tiles or flat slate-like tiles. One of the biggest advantages of clay and concrete tiles is their longevity – these roofs can easily last 50 years or more with proper care. In fact, it’s not uncommon for a clay tile roof to last well over half a century, outliving the underlayment which may need replacement once during that time. Tiles are also completely fireproof (a significant benefit in any climate). In terms of aesthetics, clay tiles offer a timeless Old World charm with their earth-tone colors and barrel shapes, while flat concrete tiles can provide a clean, slate-like appearance. This makes tile roofing highly attractive and a great boost to curb appeal for many Arlington homes. Tile roofing holds up admirably under Texas heat and sun. Concrete tiles in particular are excellent insulators – their mass and shape help slow heat transfer into the attic. There is often an air gap under the curved tiles, which ventilates and further reduces heat penetration. This means tile-roofed homes can stay cooler in summer, easing the load on air conditioning. The weight of clay and concrete tiles is also an asset in high winds; a heavy tile is less likely to be ripped off by gusts, and when properly fastened, tile roofs have a good record of surviving strong wind events. Furthermore, tiles are durable against routine weather. They resist hail better than lightweight shingles – small to medium hailstones tend to bounce off without significant damage due to the tiles’ density. However, it’s important to note that tile is not indestructible. An exceptionally large hailstone (or flying storm debris) can crack clay or concrete tiles on impact. We’ve seen cases in North Texas where baseball-sized hail left a tile roof with a number of broken pieces that had to be replaced. Fortunately, individual damaged tiles can usually be swapped out without replacing the whole roof. Another consideration is the weight: clay and concrete tiles are very heavy (several hundred pounds per 100 sq ft of roof area), so your home’s structure must be able to support them. Often, older homes not originally designed for tile may require structural reinforcement if converting to a tile roof. Installation is specialized and labor-intensive as well, which adds to the cost. In short, clay/concrete tiles offer superb longevity and thermal performance for North Texas heat, and they endure typical storms well. Just be mindful of the structural requirements and the fact that extreme hail can still cause some damage. With the right conditions and maintenance, a tile roof is a gorgeous, long-lasting choice that performs solidly in our climate. Slate Roofing: Premium Durability and Elegance Slate roofing is often considered the gold standard of roofing materials. It is a natural stone (typically quarried schist), and a slate roof on an Arlington home immediately conveys a sense of classic elegance and high quality. The upfront cost of real slate is among the highest of any roofing, but it delivers unmatched longevity: a well-installed slate roof can last 100 years or more. Many historic buildings still have their original slate roofs functioning after a century. This incredible lifespan means slate can effectively be a one-time investment in roofing, outlasting multiple generations of owners. Slate is also completely impervious to fire, rot, and insects – it will not burn and isn’t degraded by moisture or organic growth, which is ideal for humid North Texas weather. In summer, slate’s thermal properties are favorable; the material doesn’t absorb much heat and its light color options can reflect sun, plus the tiles tend to keep a naturally cooler surface that can help reduce air conditioning usage a bit. When it comes to severe weather, slate is very robust but not unbreakable. The stone tiles have a high resistance to wind – they lie heavy on the roof and are usually securely nailed and overlapped, so they aren’t easily lifted by gusts. Quality slate installations have survived major windstorms with minimal loss of tiles. Slate also holds up reasonably well against hail. Small hail will not damage slate at all. Even moderate hail (up to around golf-ball size) usually just causes some cosmetic surface chipping at most. However, just like clay tile, very large or fast-falling hailstones can crack or split a slate shingle on rare occasions. It’s uncommon, but if a slate tile does crack, that piece would need replacement to keep the roof waterproof. The good news is slate’s extreme durability means it’s less likely to be damaged in the first place compared to softer materials. The primary drawbacks of slate are its weight and cost. Slate is extremely heavy – even heavier than concrete tile – so the roof structure must be engineered or reinforced to carry it. Installation requires skilled slate craftsmen; not every roofing contractor has the expertise for slate, which can make finding the right installer challenging. The material cost plus labor make slate roofs quite expensive upfront. Despite this, for homeowners who desire the absolute longest-lasting roof and a distinct upscale aesthetic, slate is a compelling choice. It will perform excellently in North Texas heat and hold up through decades of hail and storms (with perhaps the occasional minor repair). Just be sure to work with experienced professionals so that your home can literally carry the weight of this investment. With proper care, a slate roof offers century-long peace of mind and a timeless beauty that few materials can match. Synthetic Roofing Materials: Modern Solutions for Extreme Weather In recent years, synthetic roofing materials (also known as composite or engineered roofing) have become popular in Texas. These products are made from advanced polymers, rubber, and other composites to mimic traditional materials like slate, wood shake, or clay tile while improving on certain performance aspects. For example, synthetic slate shingles offer the elegant look of real slate but at a fraction of the weight. Many synthetic tiles are made from combinations of recycled plastics, rubber, and UV-resistant additives, formed into convincingly realistic shapes. The big appeal of synthetic roofing is that it can provide high-end aesthetics with enhanced durability perfectly suited for North Texas’ climate. A quality synthetic roof is built to handle our weather extremes: these materials are often engineered to be highly impact-resistant and wind-resistant. In fact, many composite shingles carry a Class 4 impact rating – the industry’s highest – meaning they can withstand large hail strikes and heavy debris impacts without cracking. This level of hail resilience often outperforms the natural materials they imitate, since polymers can flex slightly on impact instead of shattering. Likewise, synthetic roofs are generally rated for high winds; they are lighter than stone or clay but usually installed in interlocking systems that hold tight against uplift. They also tend to be impervious to moisture and won’t rot or corrode, which is ideal for humid or rainy weather. Many synthetic products are manufactured with UV inhibitors, so they resist sun damage and thermal expansion in the scorching Texas heat. The longevity of synthetic roofing can be quite impressive as well. Depending on the product, these roofs often come with 30 to 50-year warranties. In practice, a well-made polymer composite roof can last upwards of 50 years, rivaling metal roofing in lifespan and far exceeding standard asphalt shingles. For instance, some composite slate or synthetic shake shingles have shown they can endure decade after decade of Texas weather with minimal loss of integrity. Another variety, rubber roofing, fits into this category – notably EPDM rubber membranes used on flat or low-slope roofs. While most Arlington homes have pitched roofs, any sections that are flat (e.g. porch or extension roofs) might use a membrane like EPDM. These rubber roofs are extremely durable in their own right: an EPDM roof can have a life expectancy of over 50 years with proper installation. Thanks to its flexibility, a rubber membrane can absorb thermal expansion and even blunt the impact of hail without fracturing. Additionally, there are rubber-based synthetic shingles (made from recycled tires) specifically designed for hail-prone regions; they have a bit of “give” to absorb hail impact and are virtually immune to cracking. The downsides of synthetic roofing materials are relatively few but worth noting. The cost is still on the higher side – generally comparable to metal roofing or premium options (though usually less than natural slate or imported clay tile). Availability can be more limited, and it’s important to choose a reputable manufacturer since some early synthetic products had issues and were discontinued. Also, while the look is very convincing these days, a trained eye might notice a slight difference compared to the natural material being emulated. Overall, however, synthetics are an innovative, resilient choice for North Texas homes. They marry the aesthetic charm of classic roofs with engineering that directly tackles our biggest climate challenges (hail, UV, wind). For homeowners who want a long-lasting roof without the structural burden of heavy tile or slate, synthetic roofing offers an excellent middle ground. Choosing the Best Roofing Material for Your North Texas Home When planning a roof replacement in Arlington TX, it’s important to evaluate your priorities. Different materials shine in different areas, whether it be longevity, upfront cost, style, or weather performance. Based on our experience, we at Texas Republic Roofing advise homeowners to weigh the following considerations to make the optimal choice: • Longevity: If you intend to stay in your home for the long haul or want a roof that truly lasts, consider premium materials. Slate and clay tile have exceptional lifespans (50+ years, with slate reaching 100 years) and metal roofing routinely lasts 40-70 years. Synthetic composite roofs often come with 50-year warranties as well. By contrast, standard asphalt shingles (20-30 year lifespan) will likely require replacement at least once or twice in the same period. A longer-lasting roof can save money in the very long term and adds value to your property, though the upfront investment is higher. • Cost-Effectiveness: Asphalt shingles are the most cost-effective upfront – their installation cost is the lowest, which is why they dominate in most neighborhoods. If your budget is tight, a high-quality architectural asphalt shingle is usually a sensible choice. However, remember the trade-off: you may face another re-roof in a couple of decades, and frequent storm repairs. Metal, synthetic, and tile roofs cost more initially but can be more economical over the roof’s life since they need fewer replacements and repairs. Metal roofs, for instance, might even reduce your insurance premiums (due to fire and hail resistance) and energy bills, adding to their value. When calculating cost-effectiveness, consider both the initial investment and the long-term costs of maintenance, repairs, and replacements. Sometimes spending more up front on a durable material will pay off in peace of mind and fewer out-of-pocket expenses down the road. • Aesthetics and Style: The material you choose should complement your home’s appearance and your personal style. If you love a classic or upscale look, slate or clay tile can deliver stunning curb appeal – ideal for historic or Mediterranean-inspired homes. For a rustic or natural look, wood shakes were traditionally used, but modern homeowners often opt for synthetic shake (or metal shake profiles) to get the look without the upkeep. Metal roofing can provide a sleek, modern aesthetic (e.g. standing seam on a contemporary farmhouse) or even mimic shingle/tile styles with the right product. Asphalt shingles, meanwhile, offer the greatest variety of colors and designs, fitting into any suburban street scene without standing out. They can even imitate the dimensional look of wood or slate at a fraction of the cost. Synthetic composite tiles can be made in virtually any color or shape, so they’re an excellent choice if you want a custom color blend or a very specific historic look (without sourcing expensive natural materials). Essentially, if curb appeal is a top priority, you may lean toward the materials that offer unique textures and depth – slate, tile, wood-look, or metal – rather than basic shingles. Just be sure your choice is also practical for our climate. (For example, natural wood shakes, while charming, are not recommended in North Texas due to their susceptibility to fire, rot, and hail damage.) • Climate Adaptability: Given Arlington’s weather, you’ll want a roof that can handle hail, wind, heat, and humidity with minimal fuss. In this regard, certain materials clearly stand out. Metal roofing and synthetic/composite shingles are among the best for overall climate resilience – they boast top hail-impact ratings, high wind resistance, and no issues with moisture absorption. If hailstorms are your primary worry (as is the case for many North Texans), metal (especially stone-coated steel) or a Class 4 impact-rated composition shingle are wise choices. Asphalt shingles will protect your home in normal conditions, but severe hail can bruise or tear them more readily, so keep that in mind if you choose asphalt; you might opt for the hail-resistant varieties and be diligent about inspections after big storms. Tile roofs (clay/concrete) are superb under intense sun and decent against hail – they won’t be damaged by UV or heat and smaller hail tends to leave them unscathed. Just remember that extremely large hail can crack tile, so there’s some risk in a record-breaking storm. Slate is similar: excellent against typical weather and smaller hail, but vulnerable to very large impacts. In terms of wind and storm durability, metal panels, tightly fastened, are probably the best bet (many are tested in hurricane conditions). Concrete tiles and high-quality asphalt shingles can also withstand strong winds if installed to code (with proper nailing patterns and sealing); slate and clay tile are heavy and generally stable, but individual pieces could dislodge if winds find a weak point. Also consider the maintenance aspect of climate: for instance, darker asphalt shingles may develop algae in our humid, warm environment (those black streaks), so you might choose algae-resistant shingle options or plan for occasional cleaning. Metal and synthetic roofs tend to shed algae and debris more easily and are simpler to clean if needed. Overall, think about which weather factor concerns you most and choose a material known to excel against that threat. Often, a balanced choice that covers all bases (like an impact-rated asphalt shingle or a metal roof) offers the best peace of mind in North Texas’s unpredictable climate. Finally, always ensure your roof is installed by experienced professionals and kept in good repair. Even the best material can underperform if poorly installed or neglected. Regular inspections, especially after hailstorms, are key to catching small issues before they grow. And if you ever do sustain damage, prompt roof repairs in Arlington TX can extend the life of your roof and protect your home from leaks. Whether it’s a minor fix or a complete new roof, our team at Texas Republic Roofing is ready to help North Texas homeowners with top-quality materials and expertise. We understand the unique challenges of Arlington’s climate and will recommend what works best for your situation. By choosing the right roofing material – and the right roofing contractors to install it – you can ensure your Arlington home stays safe, dry, and looking its best through every hailstorm and heat wave that Texas throws its way.

Choosing the right roofing contractor is one of the most important decisions a homeowner can make to protect their investment. Your roof guards your home against Texas’s harsh sun, surprise hailstorms, and heavy winds, so you need a contractor who will install or repair it with expert care and integrity. At Texas Republic Roofing, a trusted roofing company in Arlington TX, we understand how overwhelming this choice can be. With our experience guiding homeowners through roof repairs in Arlington TX and replacements, we’ve developed a clear, actionable checklist to help you identify the best professional for the job. Use the following steps to evaluate roofing contractors in Arlington TX and ensure your project is in capable hands. Figure: A professional roofing contractor in Texas inspecting a roof for hail damage. A reliable local contractor will understand regional weather challenges and be fully licensed, insured, and experienced to protect your home. 1. Verify Credentials and Certifications Begin by confirming the contractor’s credentials. In Texas, roofers are not required to hold a state license, but reputable professionals often pursue voluntary certifications to demonstrate their expertise. For example, the Roofing Contractors Association of Texas (RCAT) offers a voluntary licensing program that requires applicants to show proof of business registration, carry proper insurance, and pass an exam. Likewise, check if the contractor is registered with the City of Arlington; contractors must be registered locally to obtain roofing permits. These credentials indicate the company is operating legally and adheres to industry standards. Beyond basic registrations, look for professional affiliations and manufacturer certifications. Membership in organizations like the National Roofing Contractors Association (NRCA) or an A+ rating with the Better Business Bureau (BBB) signals a commitment to high standards and ethical business practices. Manufacturer certifications are also a strong plus – for instance, a roofer certified by GAF or Owens Corning has met strict installation standards and can often offer extended manufacturer warranties on roofing materials. You can even verify a contractor’s manufacturer certifications by checking the manufacturer’s official website. In short, the best contractors will proudly share their qualifications, from years in business and local awards to factory-trained status. These credentials give you confidence that the company has the knowledge and backing to do the job right. 2. Confirm Proper Insurance Coverage Never hire a roofing contractor without proof of insurance. Roofing is hazardous work – without the right insurance, any accidents or damage on your property could become your financial responsibility. General liability insurance protects your home if the contractor accidentally damages your property (for example, if they drop equipment and break a window). Workers’ compensation insurance covers injuries to the roofing crew so that if a worker falls or gets hurt on your roof, their medical bills and lost wages are paid by the contractor’s insurance, not by you. Always ask to see the contractor’s insurance certificate and ensure the coverage is current and will remain in effect for the duration of your project. A qualified contractor will readily provide evidence of both types of insurance. Take the time to verify the details – note the policy expiration dates and coverage amounts. If something seems off or the contractor hesitates to provide documentation, consider it a red flag. Hiring an uninsured or underinsured roofer might save a little money up front, but it exposes you to huge risks. Reputable companies like Texas Republic Roofing carry robust insurance policies for every project because protecting our customers’ homes (and our workers) is a non-negotiable priority. Your peace of mind during a roof installation or repair comes from knowing you won’t be on the hook if an accident happens. 3. Research Reviews and References A contractor’s past work and reputation in the community are strong indicators of what you can expect. Start by reading online reviews on platforms like Google, Yelp, and the BBB. Look for overall patterns in the feedback. Consistent praise for punctuality, quality of workmanship, and customer service is a good sign, while repeated complaints about missed deadlines or poor communication are obvious warnings. Don’t be swayed by one extreme review; instead, focus on recurring themes that paint a true picture of the contractor’s business practices. Next, ask each prospective roofer for a list of local references – recent clients in your area whose projects were similar to yours. A reputable contractor should willingly provide a few names and phone numbers. When you contact these references, ask about their experience: Was the project completed on time and on budget? How was the crew’s professionalism on site? Has the roof held up well since? Additionally, verify the contractor’s track record in Arlington. You can search the City of Arlington’s permit database to see if and when they last pulled a permit for roofing work in the city. This not only confirms they’re active locally but also that they follow proper permitting procedures. It’s also wise to check the contractor’s BBB profile for their rating and any complaint history. By doing your homework on reviews and references, you’ll quickly narrow your list to companies that consistently deliver satisfaction. 4. Ask About Warranties and Guarantees Any roofing job should come with warranties – make sure you understand them fully before you choose a contractor. There are usually two types of warranties to inquire about. First is the manufacturer’s warranty on roofing materials (shingles, underlayment, etc.), which covers defects in the products themselves. Depending on the material and brand, these warranties can range from 20 years to a “lifetime.” The second is the workmanship warranty provided by the contractor, which is their guarantee on the installation work. This means if your new roof leaks due to an installation error, the contractor promises to fix it at no cost to you within a certain period (for example, 5 or 10 years after installation). A quality-focused contractor will readily explain both types of coverage. They should specify what exactly is covered, how long each warranty lasts, and any conditions that could void the warranty (such as poor maintenance or unauthorized repairs). Insist that all warranty details are documented in the written contract or proposal. Be cautious of any roofer who only offers the manufacturer’s warranty but no workmanship guarantee – it may indicate they don’t have confidence in their own labor. Also, consider the contractor’s longevity and stability. A 10-year workmanship warranty means little if the company is fly-by-night and might not be around in a few years to honor it. Established local companies like Texas Republic Roofing not only use materials backed by strong manufacturer warranties, but we also stand behind our labor with our own guarantee, giving customers added peace of mind. When comparing bids, pay close attention to who offers solid assurances in writing; it’s a key sign of accountability and quality. 5. Evaluate Material Choices and Quality Your roof’s durability and performance will heavily depend on the materials used, so you want a contractor who offers quality options and can knowledgeably discuss what’s best for your home. In your vetting process, ask each roofer what roofing materials they recommend and why. A professional contractor will consider your budget, aesthetic preferences, and the demands of Arlington’s climate when suggesting materials. They should outline the pros and cons of common roofing choices – for example, asphalt shingles vs. metal roofing vs. tile – including cost, lifespan, and maintenance differences. If your neighborhood has a homeowners’ association or architectural guidelines, a seasoned roofer will be aware of any restrictions on roofing styles or colors, ensuring their recommendations comply with local rules. Pay special attention to whether the contractor is proposing high-quality, name-brand materials or suspiciously cheap, generic products. Top roofing companies partner with trusted manufacturers and often hold certifications with them (as mentioned earlier), which means they can offer you the best materials and extended warranty options. Also, consider local weather challenges when evaluating materials. In North Texas, impact-resistant (Class 4) shingles are popular because they withstand hail and wind damage far better than standard shingles. A knowledgeable contractor might recommend these or other durable materials (like stone-coated steel or upgraded underlayment's) if your home is frequently exposed to storms. Likewise, they might suggest proper attic ventilation or “cool roof” shingles that reflect heat, to help with energy efficiency during Arlington’s hot summers. The key is that the roofer should demonstrate technical insight into material performance – not just push whatever is easiest for them to install. When a contractor takes the time to walk you through material options and uses quality products, it shows a commitment to doing the job right the first time with a roof that will last. 6. Choose a Contractor with Local Expertise Working with a local roofing contractor offers crucial advantages that can’t be overstated. Local expertise means the company is intimately familiar with Arlington’s building codes, permit processes, and climate considerations. They’ll handle the permitting for your roofing job correctly and ensure all work meets city requirements – for instance, in Arlington all significant roof work (over 10% of the surface) requires a city permit and inspection, and a local contractor will proactively pull those permits (if a roofer tells you a permit isn’t needed, that’s a red flag). Hometown experience also means the roofer understands regional weather patterns. Arlington sees everything from blazing sun and high humidity to spring hailstorms and occasional tornado-force winds, and these conditions should influence how a roof is installed. A contractor who has weathered many Texas storm seasons will know, for example, where extra attic ventilation may be needed to beat the heat, or how to reinforce roofing systems against wind uplift. They might suggest specific architectural shingles rated for high winds or recommend techniques to guard against wind-driven rain. If a freak hailstorm hits, a local team can respond quickly for emergency repairs or tarping, whereas out-of-town contractors might be unavailable when you need them most. Another benefit of choosing a company with roots in the community is accountability. Local businesses depend on their reputation. They can’t afford to do shoddy work and disappear – their name is known in the area and they likely get a lot of business from referrals. In contrast, be very cautious about “storm chasers” – contractors from out of town who flood into Arlington after a big storm, going door-to-door offering quick fixes. These transient crews often aren’t properly licensed or registered, may lack insurance, and will vanish as soon as they’ve made a quick profit, leaving you high and dry if you have issues later. Always verify a contractor’s local address and contact information. The best roofing contractor for you will be one with an established presence in the Arlington/Dallas-Fort Worth area, who knows the local neighborhood styles and challenges, and who will be around to honor warranties or provide follow-up service. At Texas Republic Roofing, we take pride in being part of this community and leveraging our local knowledge to better serve our neighbors. From navigating city permit offices to understanding the impact of a Texas-size hailstorm on your roof, a contractor with local expertise will make the entire roofing process smoother, safer, and more reliable for you. Making an Informed Decision Selecting the right roofer may take a bit of effort, but it’s worth every minute spent. By following this checklist – verifying credentials and insurance, checking reviews and references, understanding warranties, evaluating materials, and favoring local expertise – you’ll be equipped to choose a contractor who is qualified, honest, and a great fit for your project. Remember that your roof is a major investment in your home’s longevity and your family’s safety. It pays to choose Arlington TX roofers who will do it right the first time and stand behind their work. We hope this guide makes your decision easier. If you have any questions or need a professional opinion, Texas Republic Roofing is here to help. We invite you to reach out for a free roof inspection or consultation. In the end, the best roofing contractor is one who ticks all the boxes on your checklist – experienced, insured, well-reviewed, quality-focused, and local – and we strive to meet those standards on every project we undertake. With the right partner by your side, you can proceed with confidence, knowing your home is in good hands and your new roof will protect you for years to come.
Hailstorms are a common threat in North Texas, capable of wreaking havoc on homes with little warning. Texas experiences more than 1,200 hailstorms per decade – averaging over 120 storms each year – and hail is one of the state’s costliest weather hazards. These intense storms, especially during the spring hail season (March through June), can batter your roof with high winds and ice, leading to hidden structural issues and leaks. At Texas Republic Roofing , we’ve seen firsthand how even a brief hailstorm can compromise a roof’s integrity. Homeowners often feel overwhelmed after such an event, but taking prompt, strategic action can minimize damage, expedite repairs, and protect your property. Below, we outline seven essential steps to follow after a hailstorm to ensure your roof is repaired correctly and your home stays safe. Step 1: Assess Exterior Damage Safely and Document Everything Once the storm passes and it’s safe to go outside, carefully inspect your home’s exterior for any signs of roof damage. Start from the ground – do not climb onto a slick or unstable roof. Walk around the perimeter and use binoculars or zoomed phone photos to check the roof. Look for obvious problems like debris, fallen tree limbs, or shattered shingles. Common signs of hail damage include: Dented or bruised shingles – dark circular spots or soft areas where protective granules are knocked off. Missing or torn shingles – high winds and hail can dislodge shingles, exposing the underlayment. Cracked tiles or shingles – hail impact may crack clay tiles or asphalt shingles, especially if they’re older or brittle. Damaged metalwork – dents in metal flashing, gutters, downspouts, or roof vents, indicating large hail strikes. Take clear, well-lit photographs of all damage you observe on the roof, gutters, siding, windows, and around your property. It’s also helpful to record a video walkthrough narrating the damage. This documentation will be invaluable for insurance claims and for contractors assessing the repairs. Remember to note less obvious issues too, like large hailstones collected in your yard or granules accumulating in downspouts, as these are evidence of potential roof damage. By thoroughly documenting the aftermath, you’ll have proof of the hailstorm’s impact and a clearer picture of the necessary fixes. Step 2: Check the Attic and Ceilings for Leaks or Water Damage After inspecting the exterior, go inside your home to evaluate if any water is making its way in. Hail can create punctures or micro-cracks that aren’t immediately visible on the roof but may result in leaks once rain follows. Inspect your attic and top-floor ceilings for telltale signs of water intrusion: look for new water stains, damp insulation, dripping water, or discoloration on wood and drywall. Use a flashlight to scan the attic thoroughly; pay special attention around roof penetrations like vents, chimneys, and skylights. If you discover any active leaks or wet spots, take quick action to prevent further interior damage. Place buckets or plastic sheeting under dripping areas to catch water. You can also lay down towels or tarps to protect flooring and furniture. If a leak is significant, consider poking a small hole in bulging ceiling paint or drywall to let water drain out into a bucket – this can relieve pressure and minimize ceiling collapse. Keep documenting any interior damage with photos. Finding leaks early and containing them is critical. Moisture can lead to mold growth and structural deterioration if left unchecked. By addressing interior issues promptly, you’ll safeguard your home’s interior and provide your insurer and contractor a full picture of the storm’s impact. Step 3: Perform Temporary Repairs to Prevent Further Damage A sturdy tarp covers a storm-damaged roof as a temporary shield against rain. Once you’ve identified problem areas, it’s vital to secure your home against additional weather. You may need to implement temporary fixes to protect exposed parts of the roof from rain or debris until permanent repairs can be made. For instance, if hail punched a hole through the roof or knocked shingles off, cover the damaged sections with tarps tightly secured with nails or screws and wood strips. This emergency tarping will keep water out of your attic and structure. If a window was broken, board it up with plywood or heavy plastic sheeting. Safety is paramount – only attempt interim repairs if you can do so without personal risk (e.g., from a ladder for low areas). Avoid climbing on a steep or wet roof; if in doubt, wait for professional help. Inside, continue to contain any leaks with buckets and towels as described in Step 2. Do not initiate any permanent repairs yet (like replacing shingles or attempting major fixes) until an insurance adjuster can assess the damage. Insurers need to see evidence of damage before it’s altered. However, most policies expect homeowners to make reasonable temporary repairs to prevent worsening of damage – and will typically reimburse costs for tarping or boarding up as part of the claim. Save all receipts if you purchase tarps, wood, or emergency repair services. By quickly stabilizing the situation with short-term measures, you protect your home from further harm and set the stage for a smoother restoration. Step 4: Schedule a Professional Roof Inspection with a Local Expert Once immediate dangers are addressed, the next step is to get a comprehensive roof inspection by a qualified roofing professional. Hail damage isn’t always obvious to the untrained eye – some impacts may not leak right away but can shorten your roof’s lifespan significantly. Contact a reputable roofing company in Arlington TX (such as Texas Republic Roofing) to perform a thorough assessment of your roof’s condition. We recommend choosing a local contractor with an established presence in the community – after major storms, “fly-by-night” roofers often arrive from out of town, but you should avoid anyone who isn’t reasonably local. Established local companies are more likely to be trustworthy, properly licensed, and familiar with Arlington’s building codes and weather challenges. During the inspection, our team will examine every aspect of your roof and exterior, including shingles, flashing, chimneys, eaves, and vents. Professional inspectors know how to identify hidden damage like bruised underlayment, loose sealant, or hairline cracks that homeowners might miss. They can also spot issues that might lead to future leaks, such as compromised flashing or ventilation problems. Expect the contractor to document the damage in detail, often with photos or a written report. This report is incredibly useful for insurance purposes, as it provides a third-party expert evaluation of the hail damage. In many cases, roofing professionals can perform temporary repairs on the spot – for example, re-securing dangling gutters or adding more tarp – to further safeguard your home while you plan permanent fixes. After the inspection, you should receive a clear summary of all observed damage and an initial idea of repair needs. With this expert assessment in hand, you’ll be well-prepared to move forward with insurance claims and repair decisions. Step 5: Contact Your Insurance Company and Start the Claims Process With documentation from your own inspection and the professional roofer’s evaluation, notify your homeowner’s insurance provider about the storm damage as soon as possible. Most policies cover hail and storm damage, so you’ll want to begin the claims process promptly. Call your insurance company’s claims hotline or file a claim online, and be ready to provide a summary of what happened (date and time of the hailstorm) and the extent of damage you’ve found. Offer to send them the photos and videos you took, along with the inspection report from your roofing contractor – these pieces of evidence will support your claim and help the insurer understand the scope of damage. The insurance company will assign a claim number and an adjuster to your case. Make sure to ask about any specific steps they require and write down your claim adjuster’s contact information. Next, an insurance adjuster will schedule a visit to inspect your property and verify the damage. When this inspection is set up, it’s highly beneficial to have your roofing contractor present on site while the adjuster examines the roof. We at Texas Republic Roofing often meet adjusters alongside our customers. Our expertise ensures that no damage goes unnoticed – we can point out hail impacts or related issues the adjuster might miss, helping to ensure all legitimate damage is included in the claim. Once the adjuster completes their assessment, the insurance company will provide an estimate of the repair or replacement costs they are willing to cover. Compare the insurance estimate with the contractor’s estimate if you have one already. If the insurance payout seems insufficient to cover necessary work, your contractor can often help by supplying additional evidence or negotiating with the insurer for a fair settlement. Throughout this process, maintain clear communication with your insurance provider. Keep notes of all calls and copies of all correspondence. Filing an insurance claim can feel complex, but by being proactive and providing thorough documentation, you increase the chances of a smooth, favorable claims outcome that will fund the proper repairs for your roof. Step 6: Review Repair vs. Replacement Options and Plan the Work After your claim is approved and you know what resources are available, it’s time to determine the best long-term solution for your hail-damaged roof. Consult with your roofing contractor to review the scope of work needed. In some cases of moderate damage, targeted roof repairs in Arlington TX may be sufficient – for example, replacing a section of missing shingles, fixing a few leaks, and patching isolated problem spots. Modern roofing techniques allow quality repairs that blend with your existing roof if the damage is not widespread. However, if the hailstorm caused extensive destruction (such as many shingles bruised or cracked across the roof, significant leaks, or structural damage to decking), a full roof replacement in Arlington TX might be the more effective and economical choice. We will give you an honest assessment of whether patching will truly restore your roof or if a complete re-roof is warranted for your home’s safety. When reviewing options, consider the following with your contractor and insurance coverage in mind: cost, longevity, and resilience. A repair is cheaper and faster, but a replacement provides a brand-new roof with maximum lifespan and often improved materials. Ask about material upgrades that could better resist future storms. For instance, upgrading to Class 4 impact-resistant shingles or hail-resistant roofing materials can pay off in the long run. These materials are designed to withstand hail impacts and might even earn you an insurance premium discount. Your contractor should also discuss the warranty on repairs vs. a new roof. Make sure you receive a written estimate and contract detailing all work to be done, whether it’s a repair or replacement. This should include materials, labor, timeline, and cleanup. If there are any code upgrades required (for example, if local building codes in Arlington have changed since your roof was last installed), verify whether your insurance policy covers those additional costs. Taking the time to carefully evaluate your repair options ensures you make an informed decision – one that balances immediate needs with long-term protection for your home. Step 7: Hire a Trusted Roofing Contractor to Complete Repairs and Prevent Future Issues Once you’ve agreed on a repair plan, the final step is executing the work with a qualified roofing contractor you trust. Choose a contractor who is properly licensed and insured, and has solid references or reviews – your insurance may even have vetted recommendations. At this stage, prompt scheduling is important: After a major hailstorm hits a community, reputable contractors’ schedules fill up quickly with repair jobs. Try to get on the repair schedule as early as possible to avoid long waits or material shortages. Texas Republic Roofing prides itself on efficient project management – when you give us the go-ahead, we mobilize quickly to prevent any further deterioration of your property. An expert roofer replaces damaged shingles with high-quality materials after a hailstorm. On the day of repair or replacement, our professional crew will arrive on time and handle the job with the utmost care and craftsmanship. We follow all safety protocols and manufacturers’ guidelines, whether we’re installing new shingles, replacing flashing, or rebuilding sections of roof decking. Throughout the process, we treat your property respectfully – covering bushes and windows, keeping the work area tidy, and ensuring nails or debris are cleaned up each day. Upon completion, we conduct a final walkthrough and inspection with you to make sure every agreed repair has been executed to our high standards and your satisfaction. We will also provide documentation of the completed work and any warranty information for new materials or labor. Finally, don’t consider the job truly “done” without planning for ongoing roof maintenance. A repaired or new roof is a significant investment in your home’s future – protecting it will maximize its lifespan. Experts recommend having your roof inspected at least once a year, and especially after severe weather seasons, to catch emerging issues early. We suggest scheduling a routine inspection each spring or fall and after any major hail or wind event. Regular maintenance (like keeping gutters clear, trimming overhanging branches, and replacing the occasional loose shingle) can prevent minor problems from turning into major headaches. Texas Republic Roofing is always here to support you with annual check-ups and any future needs. By following these steps after a hailstorm – and partnering with a reliable local contractor – you can restore your Arlington roof swiftly and ensure your home is well-defended against the next Texas storm.

When it comes to your roof, knowing when to replace it is crucial for protecting your home. As a leading roofing company in Arlington TX, we understand the challenges local homeowners face with our harsh weather and aging roofs. In this comprehensive guide, we’ll explain how to determine if it’s time for a new roof, especially in storm-prone North Texas. We’ll cover the impact of climate, the difference between repairs and replacement, key warning signs of roof failure, and the benefits of timely roof replacement – all in order to help you make an informed decision about your home’s roofing needs. North Texas Weather and Roof Longevity Our region’s climate can be tough on roofs. Blistering summer sun, high humidity, and sudden temperature swings can all shorten a roof’s lifespan. Even a well-built asphalt shingle roof might only last about 15 to 25 years in Texas conditions before it starts deteriorating. UV radiation and heat can cause shingles to dry out and crack over time, while thermal expansion and contraction gradually loosen roofing materials. Severe storms compound the wear and tear. North Texas is part of the infamous “Hail Alley,” and violent hailstorms and windstorms are common. In fact, Dallas-Fort Worth saw intense hailstorms in 2023, with entire neighborhoods suffering roof damage. The Arlington area frequently endures large hail and 70+ mph winds during spring storm season, which can tear off shingles, dent metal flashing, and even puncture roofing materials. With our community under dozens of severe weather warnings each year, it’s no surprise that storm damage is a leading reason for roof replacements here. Simply put, the climate in Texas – from relentless sun to hail “ice bombs” – accelerates roof aging and can necessitate a replacement sooner than in milder regions. Repair or Replace? Making the Right Choice One of the most common questions homeowners ask is whether they can get by with repairs or if a full replacement is needed. Minor issues can often be addressed with roof repairs in Arlington TX – for example, replacing a few shingles after a light windstorm or fixing a small leak around a vent. If your roof is relatively young (under 10-15 years) and the damage is isolated, a repair can be a cost-effective solution to extend its life. We always recommend starting with a professional inspection to evaluate the overall condition of the roof. However, there comes a point when continuing to patch a failing roof is no longer wise. If you’ve had multiple repairs already, you may be spending more on frequent fixes than it would cost to invest in a new roof. Likewise, if a recent storm caused widespread damage across large portions of your roof (for instance, hail damage on many slopes or extensive wind uplift), repairs alone won’t restore full protection or energy efficiency. In these cases, a full replacement is the safer long-term choice. Remember, a roof nearing the end of its lifespan will likely need replacing soon even if you repair it now – a patch might only delay the inevitable. Plus, after severe storm damage, your homeowner’s insurance may cover most or all of the replacement cost, making a new roof more accessible than you might think. The bottom line: if your roof is very old, severely storm-damaged, or repeatedly problematic, replacement is the smarter and more cost-effective option to protect your home. Top Signs You Need a Roof Replacement How can you tell, day-to-day, that it’s time for a new roof? Here are the most important warning signs and reasons that signal your roof may need to be replaced rather than repaired: 1. Roof Age Exceeds 20 Years: The typical asphalt shingle roof lasts 20–25 years at most, even under ideal conditions. In our Texas climate, that lifespan can be on the shorter end. If your roof is around two decades old (or older), it’s likely nearing the end of its service life. Even without obvious damage, an aging roof becomes prone to failures. Rather than waiting for leaks to appear, it’s wise to plan for a proactive replacement once you hit the 20-year mark or the end of any manufacturer warranty. 2. Widespread or Severe Storm Damage: A single missing shingle can be fixed, but if a hailstorm or windstorm has battered your roof extensively, replacement is often necessary. Signs of severe storm damage include dozens of missing or torn shingles, hail impact marks (dents or bruises) on shingles, cracked or pitted shingles, or damaged underlayment exposed. If large sections of the roof were compromised in one event, the integrity of the entire roofing system is in question. We’ve seen cases where hail punctured shingles and underlayment across a neighborhood – in such scenarios, a new roof is the only way to ensure your home is fully protected. (It’s worth getting a professional inspection after any major hail or wind event; what looks minor from the ground can hide serious issues in the roofing layers.) 3. Curling, Buckling, or Missing Shingles: Take a look at your roof’s appearance. If many shingles are curling at the edges, cupped, or clawing (buckling in the middle), it’s a clear red flag. Shingles in this condition have lost their structural integrity and waterproofing ability. Similarly, any bald spots where shingles are missing entirely are a serious concern. Missing shingles expose your roof’s underlayment to the elements, virtually guaranteeing leaks if not addressed. While a few missing shingles can be replaced, widespread bald patches or generalized curling of shingles across the roof are signs that the entire roof is failing and should be replaced soon. 4. Shingle Granules in Gutters: When asphalt shingles wear out, they start shedding their protective granular coating. Check your gutters and downspouts – do you see accumulations of sand-like black or brown granules? If your gutters are loaded with shingle granules, it’s a sign your roof is at the end of its life. You might also notice the roof color looks uneven or patchy; that’s because bare shingles (missing granules) appear darker or lighter in spots. Once granule loss reaches this stage, shingles will deteriorate rapidly. A new roof will be needed in the near future to prevent leaks. 5. Persistent Leaks or Water Stains: Any active roof leak is a cause for concern. If you notice water stains on your ceiling or walls, especially after rain, your roof’s waterproof layer has been compromised. One small leak can often be repaired by fixing flashing or replacing a shingle, but persistent or multiple leaks indicate systemic issues. For example, if several different areas have leaked over the past couple of years, or a major leak returns even after repairs, the roof may be too deteriorated to reliably keep water out. Don’t ignore even small water spots – they can be the tip of the iceberg. Chronic leaks will lead to rot in the roof decking, mold growth, and interior drywall damage. If your attic insulation is ever found wet, that’s a sure sign moisture is infiltrating and a replacement should be considered. 6. Sagging or Drooping Roof Deck: Stand back and look at the lines of your roof. The ridge (top line) and planes of each roof slope should appear straight and solid. If you see any areas of the roof deck sagging, warped, or dipping, this is a serious structural warning sign. A sagging roof often means the underlying decking or trusses have been compromised by water damage or excessive load. Once the roof structure is weakened, a full replacement of the roofing system (and repairs to the structure) is necessary to ensure your home’s safety. A new roof will eliminate the weakened materials and reinforce the structure. Do not delay if you observe sagging; the risk of collapse or interior damage rises the longer it’s left unaddressed. 7. Damaged Flashing or Penetrations: The metal flashing around chimneys, vent pipes, skylights, and where roof planes meet walls is critical for preventing leaks. If you inspect these areas (from the ground or safely in the attic) and see flashing that is cracked, bent, or pulling away, it can allow water in. Older roofs may even use roofing cement or tar as flashing, which degrades over time. While sometimes a flashing repair can solve localized leaks, extensive flashing failure often coincides with overall roof deterioration. If multiple flashings (such as around the chimney and several vents) are failing, a roof replacement will let you reset these critical seals with new, properly installed metal flashing as part of the job. This ensures all vulnerable junctions on the roof are watertight. 8. Moss, Mold, or Rotting Sections: In our humid spring and fall, you might notice moss or algae growing on shaded parts of the roof. A little growth can be cleaned off, but thick moss can lift shingles and trap moisture. More concerning is if you find areas of the roof structure that are rotting or moldy, perhaps discovered during an inspection or repair. Rot indicates long-term moisture penetration. For example, a section of plywood decking that stays damp from a hidden leak will start to rot and soften. If a significant area of the roof deck or framing has rot, the safest solution is to replace the affected wood and install a new roof. This eliminates the compromised materials. Mold inside the attic or on rafters can also mean a chronically leaking roof. A new roof, combined with replacing any damaged wood, will solve the underlying water intrusion causing the mold. 9. Sunlight Shining Through the Attic: Here’s a simple test – on a bright day, go up to your attic (if safe to do so) and turn off the lights. Do you see any daylight coming in through the roof boards? You shouldn’t. If you can spot pinholes or little beams of light, that means your roofing is worn through (or nails have backed out leaving holes). Any opening that lets light in will also let water in. Multiple points of light in the attic are a sure indicator that your roof’s waterproof layer is compromised. A new roof will replace the worn-out shingles and underlayment that have developed holes or gaps. Similarly, check for damp insulation or a musty smell in the attic – those can signal water ingress even if you don’t see light. An intact roof will keep the attic dry and dark. 10. Neighbors Are Replacing Roofs: If you’ve noticed many homes on your street getting new roofs around the same time, it’s not a coincidence. In many Arlington neighborhoods, houses were built around the same year, so their roofs age in tandem. If several neighbors are getting roof replacements, it’s a strong sign that yours may be due as well. Don’t ignore your roof while everyone around you is proactively replacing theirs – they might be responding to the same weather impacts and lifespan realities that your home is facing. It would be wise to have your roof inspected when you see a flurry of new roofing in your area. This way, you won’t be caught off guard by a failing roof after others have already addressed the issue. Each of these signs on its own is cause for caution – and if you’re seeing multiple signs together, that’s a clear indication your roof is reaching the end of its life. We recommend scheduling a professional inspection if any of these issues arise. An expert assessment will tell you definitively if your roof can be repaired or if it truly needs replacement. Benefits of Timely Roof Replacement Deciding to replace a roof is a significant investment, but doing so at the right time comes with major benefits for you as a homeowner: • Reliable Protection: A new roof ensures your home is protected from rain, wind, and storms without the worry of leaks. You’ll prevent water damage to your attic, ceilings, walls, and foundation by replacing the roof before a major failure occurs. This proactive approach can save you from expensive repairs caused by chronic leaks or a sudden roof collapse in extreme cases. • Energy Efficiency Improvement: Modern roofing systems offer better insulation and reflectivity, helping maintain comfortable indoor temperatures. If your old roof was poorly ventilated or has lost insulating granules, your attic can overheat and force your air conditioner to work overtime. By installing a new roof with up-to-date materials (and ensuring proper attic ventilation), you can significantly reduce heat transfer. This means a cooler home in our hot summers and potentially lower cooling bills. In winter, a sound roof also helps retain heat. Overall, upgrading an aging roof can make your home more energy-efficient and reduce utility costs. • Curb Appeal and Home Value: There’s no denying that a new roof gives your home an instant facelift. Faded, discolored, or patchy shingles can make a house look old and poorly maintained. Replacing your roof allows you to choose a fresh color or architectural style that enhances your home’s curb appeal. Beyond looks, it’s also a smart investment: a new roof is one of the top home improvements for return on investment in resale value. Prospective buyers in Texas are often willing to pay a premium for a house with a recently replaced roof, knowing they won’t have to deal with roofing issues for many years. In contrast, an old roof can be a negotiating point for buyers to lower their offer. By timing your roof replacement well, you protect and potentially increase your property value. • Peace of Mind and Warranty Coverage: Living under an aging or storm-damaged roof can be stressful – every thunderstorm might have you worrying about leaks. By installing a new roof, you regain peace of mind. You know your home is safeguarded by brand-new materials designed to withstand the elements. Most new roofs come with solid manufacturer warranties (often 20-30 years for shingles, and some offer lifetime warranties on premium products). Many professional installations also include workmanship guarantees. This means if anything does go wrong, you’re covered. In contrast, once a roof is past its prime, homeowners insurance may only offer limited coverage or depreciated value for roof damage. (For example, some policies significantly reduce payouts for roofs over 15 years old.) A timely replacement ensures you have full warranty protection and fewer insurance hassles going forward. • Preparing for Future Storms: Given our storm-prone locale, replacing an old roof with a new, storm-resistant roofing system can be a wise preventive move. Upgraded materials such as impact-resistant shingles (rated Class 4) can better withstand hail strikes and may qualify you for insurance discounts. Likewise, improved installation techniques (stronger adhesives, more fasteners, high-quality underlayment's) used by professional roofers today add resilience against high winds. By proactively installing a sturdier new roof, you’re essentially armor-plating your home for the next big storm. This can spare you the disruption and expense of emergency repairs after severe weather. Think of a roof replacement not just as restoring what you had, but as fortifying your home for the future. Don’t Delay if You See the Signs Recognizing when it’s time for a new roof is essential to protect your home and wallet. If you’ve noticed any of the signs above – or if a recent storm has you worried about your roof’s condition – don’t wait until the damage gets worse. A proactive roof replacement can save you from costly interior repairs, high energy bills, and constant stress during every rainstorm. At Texas Republic Roofing , we are committed to guiding homeowners through this important decision in a professional, honest manner. Our experienced team will perform a thorough inspection and give you a clear assessment of your roof’s condition. If a replacement is needed, we’ll recommend the best roofing solutions for your situation, and if a repair will suffice, we’ll tell you that too. Our goal is to ensure your home is safe, dry, and efficient for years to come. Contact Texas Republic Roofing today to schedule a free, no-obligation roof inspection. We’ll help you determine if now is the time for a new roof and walk you through the process every step of the way. Your roof is your home’s first line of defense – with our expert help, you can make sure that defense is strong, reliable, and ready for whatever Mother Nature throws our way. Enjoy the peace of mind that comes with a solid new roof over your head, installed by a team you can trust.
When it comes to your roof, knowing when to replace it is crucial for protecting your home. As a leading roofing company in Arlington TX, we understand the challenges local homeowners face with our harsh weather and aging roofs. In this comprehensive guide, we’ll explain how to determine if it’s time for a new roof, especially in storm-prone North Texas. We’ll cover the impact of climate, the difference between repairs and replacement, key warning signs of roof failure, and the benefits of timely roof replacement – all in order to help you make an informed decision about your home’s roofing needs. North Texas Weather and Roof Longevity Our region’s climate can be tough on roofs. Blistering summer sun, high humidity, and sudden temperature swings can all shorten a roof’s lifespan. Even a well-built asphalt shingle roof might only last about 15 to 25 years in Texas conditions before it starts deteriorating. UV radiation and heat can cause shingles to dry out and crack over time, while thermal expansion and contraction gradually loosen roofing materials. Severe storms compound the wear and tear. North Texas is part of the infamous “Hail Alley,” and violent hailstorms and windstorms are common. In fact, Dallas-Fort Worth saw intense hailstorms in 2023 , with entire neighborhoods suffering roof damage. The Arlington area frequently endures large hail and 70+ mph winds during spring storm season, which can tear off shingles, dent metal flashing, and even puncture roofing materials. With our community under dozens of severe weather warnings each year, it’s no surprise that storm damage is a leading reason for roof replacements here. Simply put, the climate in Texas – from relentless sun to hail “ice bombs” – accelerates roof aging and can necessitate a replacement sooner than in milder regions. Repair or Replace? Making the Right Choice One of the most common questions homeowners ask is whether they can get by with repairs or if a full replacement is needed. Minor issues can often be addressed with roof repairs in Arlington TX – for example, replacing a few shingles after a light windstorm or fixing a small leak around a vent. If your roof is relatively young (under 10-15 years) and the damage is isolated, a repair can be a cost-effective solution to extend its life. We always recommend starting with a professional inspection to evaluate the overall condition of the roof. However, there comes a point when continuing to patch a failing roof is no longer wise. If you’ve had multiple repairs already, you may be spending more on frequent fixes than it would cost to invest in a new roof. Likewise, if a recent storm caused widespread damage across large portions of your roof (for instance, hail damage on many slopes or extensive wind uplift), repairs alone won’t restore full protection or energy efficiency. In these cases, a full replacement is the safer long-term choice. Remember, a roof nearing the end of its lifespan will likely need replacing soon even if you repair it now – a patch might only delay the inevitable. Plus, after severe storm damage, your homeowner’s insurance may cover most or all of the replacement cost, making a new roof more accessible than you might think. The bottom line: if your roof is very old, severely storm-damaged, or repeatedly problematic, replacement is the smarter and more cost-effective option to protect your home. Top Signs You Need a Roof Replacement How can you tell, day-to-day, that it’s time for a new roof? Here are the most important warning signs and reasons that signal your roof may need to be replaced rather than repaired: 1. Roof Age Exceeds 20 Years: The typical asphalt shingle roof lasts 20–25 years at most, even under ideal conditions. In our Texas climate, that lifespan can be on the shorter end. If your roof is around two decades old (or older), it’s likely nearing the end of its service life. Even without obvious damage, an aging roof becomes prone to failures. Rather than waiting for leaks to appear, it’s wise to plan for a proactive replacement once you hit the 20-year mark or the end of any manufacturer warranty. 2. Widespread or Severe Storm Damage: A single missing shingle can be fixed, but if a hailstorm or windstorm has battered your roof extensively, replacement is often necessary. Signs of severe storm damage include dozens of missing or torn shingles, hail impact marks (dents or bruises) on shingles, cracked or pitted shingles, or damaged underlayment exposed. If large sections of the roof were compromised in one event, the integrity of the entire roofing system is in question. We’ve seen cases where hail punctured shingles and underlayment across a neighborhood – in such scenarios, a new roof is the only way to ensure your home is fully protected. (It’s worth getting a professional inspection after any major hail or wind event; what looks minor from the ground can hide serious issues in the roofing layers.) 3. Curling, Buckling, or Missing Shingles: Take a look at your roof’s appearance. If many shingles are curling at the edges, cupped, or clawing (buckling in the middle), it’s a clear red flag. Shingles in this condition have lost their structural integrity and waterproofing ability. Similarly, any bald spots where shingles are missing entirely are a serious concern. Missing shingles expose your roof’s underlayment to the elements, virtually guaranteeing leaks if not addressed. While a few missing shingles can be replaced, widespread bald patches or generalized curling of shingles across the roof are signs that the entire roof is failing and should be replaced soon. 4. Shingle Granules in Gutters: When asphalt shingles wear out, they start shedding their protective granular coating. Check your gutters and downspouts – do you see accumulations of sand-like black or brown granules? If your gutters are loaded with shingle granules, it’s a sign your roof is at the end of its life. You might also notice the roof color looks uneven or patchy; that’s because bare shingles (missing granules) appear darker or lighter in spots. Once granule loss reaches this stage, shingles will deteriorate rapidly. A new roof will be needed in the near future to prevent leaks. 5. Persistent Leaks or Water Stains: Any active roof leak is a cause for concern. If you notice water stains on your ceiling or walls, especially after rain, your roof’s waterproof layer has been compromised. One small leak can often be repaired by fixing flashing or replacing a shingle, but persistent or multiple leaks indicate systemic issues. For example, if several different areas have leaked over the past couple of years, or a major leak returns even after repairs, the roof may be too deteriorated to reliably keep water out. Don’t ignore even small water spots – they can be the tip of the iceberg. Chronic leaks will lead to rot in the roof decking, mold growth, and interior drywall damage. If your attic insulation is ever found wet, that’s a sure sign moisture is infiltrating and a replacement should be considered. 6. Sagging or Drooping Roof Deck: Stand back and look at the lines of your roof. The ridge (top line) and planes of each roof slope should appear straight and solid. If you see any areas of the roof deck sagging, warped, or dipping, this is a serious structural warning sign. A sagging roof often means the underlying decking or trusses have been compromised by water damage or excessive load. Once the roof structure is weakened, a full replacement of the roofing system (and repairs to the structure) is necessary to ensure your home’s safety. A new roof will eliminate the weakened materials and reinforce the structure. Do not delay if you observe sagging; the risk of collapse or interior damage rises the longer it’s left unaddressed. 7. Damaged Flashing or Penetrations: The metal flashing around chimneys, vent pipes, skylights, and where roof planes meet walls is critical for preventing leaks. If you inspect these areas (from the ground or safely in the attic) and see flashing that is cracked, bent, or pulling away, it can allow water in. Older roofs may even use roofing cement or tar as flashing, which degrades over time. While sometimes a flashing repair can solve localized leaks, extensive flashing failure often coincides with overall roof deterioration. If multiple flashings (such as around the chimney and several vents) are failing, a roof replacement will let you reset these critical seals with new, properly installed metal flashing as part of the job. This ensures all vulnerable junctions on the roof are watertight. 8. Moss, Mold, or Rotting Sections: In our humid spring and fall, you might notice moss or algae growing on shaded parts of the roof. A little growth can be cleaned off, but thick moss can lift shingles and trap moisture. More concerning is if you find areas of the roof structure that are rotting or moldy, perhaps discovered during an inspection or repair. Rot indicates long-term moisture penetration. For example, a section of plywood decking that stays damp from a hidden leak will start to rot and soften. If a significant area of the roof deck or framing has rot, the safest solution is to replace the affected wood and install a new roof. This eliminates the compromised materials. Mold inside the attic or on rafters can also mean a chronically leaking roof. A new roof, combined with replacing any damaged wood, will solve the underlying water intrusion causing the mold. 9. Sunlight Shining Through the Attic: Here’s a simple test – on a bright day, go up to your attic (if safe to do so) and turn off the lights. Do you see any daylight coming in through the roof boards? You shouldn’t. If you can spot pinholes or little beams of light, that means your roofing is worn through (or nails have backed out leaving holes). Any opening that lets light in will also let water in. Multiple points of light in the attic are a sure indicator that your roof’s waterproof layer is compromised. A new roof will replace the worn-out shingles and underlayment that have developed holes or gaps. Similarly, check for damp insulation or a musty smell in the attic – those can signal water ingress even if you don’t see light. An intact roof will keep the attic dry and dark. 10. Neighbors Are Replacing Roofs: If you’ve noticed many homes on your street getting new roofs around the same time, it’s not a coincidence. In many Arlington neighborhoods, houses were built around the same year, so their roofs age in tandem. If several neighbors are getting roof replacements, it’s a strong sign that yours may be due as well. Don’t ignore your roof while everyone around you is proactively replacing theirs – they might be responding to the same weather impacts and lifespan realities that your home is facing. It would be wise to have your roof inspected when you see a flurry of new roofing in your area. This way, you won’t be caught off guard by a failing roof after others have already addressed the issue. Each of these signs on its own is cause for caution – and if you’re seeing multiple signs together, that’s a clear indication your roof is reaching the end of its life. We recommend scheduling a professional inspection if any of these issues arise. An expert assessment will tell you definitively if your roof can be repaired or if it truly needs replacement. Benefits of Timely Roof Replacement Deciding to replace a roof is a significant investment, but doing so at the right time comes with major benefits for you as a homeowner: • Reliable Protection: A new roof ensures your home is protected from rain, wind, and storms without the worry of leaks. You’ll prevent water damage to your attic, ceilings, walls, and foundation by replacing the roof before a major failure occurs. This proactive approach can save you from expensive repairs caused by chronic leaks or a sudden roof collapse in extreme cases. • Energy Efficiency Improvement: Modern roofing systems offer better insulation and reflectivity, helping maintain comfortable indoor temperatures. If your old roof was poorly ventilated or has lost insulating granules, your attic can overheat and force your air conditioner to work overtime. By installing a new roof with up-to-date materials (and ensuring proper attic ventilation), you can significantly reduce heat transfer. This means a cooler home in our hot summers and potentially lower cooling bills. In winter, a sound roof also helps retain heat. Overall, upgrading an aging roof can make your home more energy-efficient and reduce utility costs. • Curb Appeal and Home Value: There’s no denying that a new roof gives your home an instant facelift. Faded, discolored, or patchy shingles can make a house look old and poorly maintained. Replacing your roof allows you to choose a fresh color or architectural style that enhances your home’s curb appeal. Beyond looks, it’s also a smart investment: a new roof is one of the top home improvements for return on investment in resale value. Prospective buyers in Texas are often willing to pay a premium for a house with a recently replaced roof, knowing they won’t have to deal with roofing issues for many years. In contrast, an old roof can be a negotiating point for buyers to lower their offer. By timing your roof replacement well, you protect and potentially increase your property value. • Peace of Mind and Warranty Coverage: Living under an aging or storm-damaged roof can be stressful – every thunderstorm might have you worrying about leaks. By installing a new roof, you regain peace of mind. You know your home is safeguarded by brand-new materials designed to withstand the elements. Most new roofs come with solid manufacturer warranties (often 20-30 years for shingles, and some offer lifetime warranties on premium products) . Many professional installations also include workmanship guarantees. This means if anything does go wrong, you’re covered. In contrast, once a roof is past its prime, homeowners insurance may only offer limited coverage or depreciated value for roof damage. (For example, some policies significantly reduce payouts for roofs over 15 years old.) A timely replacement ensures you have full warranty protection and fewer insurance hassles going forward. • Preparing for Future Storms: Given our storm-prone locale, replacing an old roof with a new, storm-resistant roofing system can be a wise preventive move. Upgraded materials such as impact-resistant shingles (rated Class 4) can better withstand hail strikes and may qualify you for insurance discounts. Likewise, improved installation techniques (stronger adhesives, more fasteners, high-quality underlayment’s) used by professional roofers today add resilience against high winds. By proactively installing a sturdier new roof, you’re essentially armor-plating your home for the next big storm. This can spare you the disruption and expense of emergency repairs after severe weather. Think of a roof replacement not just as restoring what you had, but as fortifying your home for the future. Don’t Delay if You See the Signs Recognizing when it’s time for a new roof is essential to protect your home and wallet. If you’ve noticed any of the signs above – or if a recent storm has you worried about your roof’s condition – don’t wait until the damage gets worse. A proactive roof replacement can save you from costly interior repairs, high energy bills, and constant stress during every rainstorm. At Texas Republic Roofing , we are committed to guiding homeowners through this important decision in a professional, honest manner. Our experienced team will perform a thorough inspection and give you a clear assessment of your roof’s condition. If a replacement is needed, we’ll recommend the best roofing solutions for your situation, and if a repair will suffice, we’ll tell you that too. Our goal is to ensure your home is safe, dry, and efficient for years to come. Contact Texas Republic Roofing today to schedule a free, no-obligation roof inspection. We’ll help you determine if now is the time for a new roof and walk you through the process every step of the way. Your roof is your home’s first line of defense – with our expert help, you can make sure that defense is strong, reliable, and ready for whatever Mother Nature throws our way. Enjoy the peace of mind that comes with a solid new roof over your head, installed by a team you can trust.

When severe weather strikes North Texas, your roof often takes the brunt of the damage. Hailstorms, high winds, and torrential rains are common in our region – in fact, North Texas (including the Arlington area) lies in the nation’s notorious “Hail Alley,” known for frequent and intense hailstorms. As a local provider of roof repairs in Arlington TX, Texas Republic Roofing has seen even minor storm damage turn into major headaches when left unaddressed. The key is to spot problems early and fix them before small issues escalate into costly repairs or even a full roof replacement. Below are the top five signs that your roof may need repair after a storm, so you can act quickly to protect your home. 1. Missing or Damaged Shingles One of the most obvious signs of storm damage is missing or broken shingles. Shingles are your roof’s first line of defense, and violent weather can easily wreak havoc on them. High wind gusts – common in Texas thunderstorms – can lift and rip shingles off entirely. Large hail can crack shingles or bruise them by knocking off their protective granules, leaving behind dark “bald spots.” After a strong storm, step back and visually inspect your roof from the ground (you can use binoculars for a closer look). If any patches look bare or you notice shingles in your yard, that’s a clear indicator of damage. Even shingles that aren’t missing may be creased, curled, or loose after high winds. Why is this a big deal? Missing or compromised shingles expose the waterproof underlayment (and eventually the wood decking) to the elements. That makes it much easier for water to seep into your home. If you suspect shingle damage, it’s wise to contact a professional roofer for an inspection and prompt repairs. Replacing a handful of shingles immediately after a storm is a relatively quick and inexpensive fix – and it will prevent a simple issue from turning into a widespread leak or rot problem. 2. Roof Leaks or Water Stains Inside Sometimes the first sign of roof damage appears inside your home. If a recent storm left you with a drip in the attic or a new brown water stain on your ceiling, you likely have a roof leak. Water infiltrating after heavy rain or wind is a red flag that your roof’s integrity was compromised. Leaks might present as obvious drips or pooled water in the attic, but often they show up as subtle water stains on ceilings or walls (look for yellowish-brown discoloration, bubbling paint, or peeling wallpaper). You might also notice dampness or a musty odor in the attic or upstairs rooms after rain – another hint of a hidden leak. Pay extra attention to the rooms directly below the roof and check around any roof penetrations like chimneys, skylights, and vent pipes. Storm damage to flashing in those areas can let water sneak in (more on flashing in a moment). Even a small leak is serious – a minor drip can soak insulation, trigger mold growth, and rot wood framing if ignored. Don’t assume a little water stain is a one-time fluke that will dry out on its own. After any significant storm, if you discover signs of water intrusion, call a professional. At Texas Republic Roofing, our Arlington TX roof repair team uses advanced leak detection to trace even hidden leaks to their source. Fixing a leak promptly will protect your home’s structure and save you from more extensive interior repairs down the road. 3. Hail Damage: Dented Metal and Bruised Shingles Not all storm damage is immediately obvious, especially when it comes to hailstorms. Hail can batter your roof without creating a gaping hole, so you need to look for more subtle clues. One telltale sign is dented metal components: after a hailstorm, check your metal roof vents, skylight frames, gutters, and downspouts. Do you see small dents or dimples in the metal? If hail was strong enough to dent these, it very likely also damaged your shingles. Likewise, look at any exposed metal flashing along roof edges or chimneys – if it’s bent or pockmarked, that’s a sign of significant hail impact. Hail damage to shingles often isn’t visible from the ground. Rather than large cracks, hail typically causes bruises in the shingle. A hail “bruise” is a spot where the granules have been knocked away, and the shingle’s asphalt underlayer is exposed or weakened. The shingle might not have a hole, but the impact can compromise its integrity. Over time, these bruised areas can develop into leaks. In fact, hail damage is sometimes called the “silent roof killer” because the problems may not show up until weeks or months later. Don’t wait for water to start dripping – if your neighborhood got hit by hail, consider getting a professional roof inspection. Our trained inspectors know how to identify hail damage (like soft spots or dimples on shingles) that untrained eyes might miss. Catching these issues early can save you from a premature roof failure. Remember, in Arlington TX and other hail-prone areas, many insurance policies cover hail damage repairs – but they typically expect you to report damage promptly after the storm. 4. Excessive Granule Loss After a storm, check your gutters and the ground around your downspouts for an accumulation of shingle granules. Asphalt shingles are coated with tiny granules (usually gray, black, or brown) that protect them from UV rays and impact. If you find piles of gritty, sand-like granules in your gutters or washed out onto your driveway or lawn, it’s a sign your shingles took a beating. Hail impact or even extremely heavy rain can knock granules loose from the shingle surface. You might notice the granules when cleaning out the gutters or see them deposited where your downspouts release water. Losing a significant amount of granules is problematic because those granules shield the shingle from sunlight and water. When they’re gone, shingles age much faster and become more prone to cracking and leaks. Granule loss often accompanies other hail damage – for example, a close inspection might show round black spots on the shingles where granules are missing, indicating hail strikes. If a storm has stripped lots of granules off a section of your roof, that section’s lifespan has been shortened. In some cases, if the granule loss (and associated damage) is widespread across the roof, it may be more cost-effective to consider a full roof replacement in Arlington TX rather than piecemeal repairs. A professional assessment will help determine if the shingles are still sound or if they’re deteriorated to the point of needing replacement. Either way, don’t ignore granule piles – they’re essentially your roof telling you it’s been damaged. 5. Debris Impact or Punctures on the Roof Severe wind storms can turn nearby objects into airborne hazards. Fallen tree limbs are the biggest culprits, but we’ve also seen wind gusts send patio furniture, grills, and even debris from neighbors’ yards onto roofs. After any major wind event, scan your roof from ground level for any foreign objects or damage. If a branch (even a small one) is lying on your roof, it could have gouged or displaced the shingles on impact. Larger limbs can actually puncture through the roof deck, creating an opening all the way into the attic. Obvious signs include holes in the roof or shingles that are cracked with a piece missing. However, not all punctures are immediately evident – some might just look like a split or torn shingle. Check areas where debris would naturally slide or collect, like in roof valleys, near chimneys, or along lower edges. Also inspect the condition of any chimney caps or skylights; a hard impact can crack these as well. If you spot any kind of puncture, tear, or suspicious new gap in your roofing after a storm, take action quickly. First, for safety, avoid climbing onto a storm-damaged roof yourself – the structure could be unstable. Instead, call a professional roofing company. Experienced crews (like our team at Texas Republic Roofing in Arlington TX) can safely remove debris and install an emergency tarp over any openings to prevent further water intrusion. Even a small puncture will let water pour in during the next rain, so this kind of damage is urgent to address. The sooner you get the hole patched and the shingles fixed or replaced, the less chance you have of secondary problems like mold or wood rot. Act Quickly to Protect Your Home After a severe storm, don’t wait to address potential roof damage. Any of the signs above – missing shingles, leaks, dents, granule loss, or debris impacts – are telling you that your roof needs attention. What starts as a minor issue can rapidly expand into a major repair if not fixed. For example, one missing shingle can lead to a leak that soaks your insulation and drywall, or a small hail bruise can turn into a widespread moisture problem over time. By acting quickly, you can often prevent a cascade of damage. Keep in mind that a lot of storm damage isn’t obvious to the untrained eye. It’s possible to have significant roof problems (like loosened shingle seals or hairline cracks) that you wouldn’t notice from the ground. That’s why, if your home in Arlington TX has been through a big storm, it’s smart to have a professional inspect your roof. Most reputable roofing companies offer free storm damage inspections and will give an honest assessment of any issues. At Texas Republic Roofing, we specialize in prompt, reliable storm damage repair and thorough inspections. If we find damage, we can help you document it for insurance and perform the needed roof repairs in Arlington TX swiftly to secure your home. In short, Texas weather can be fierce, but swift action and regular inspections will ensure your roof continues to safeguard your family and property. Don’t let a small problem turn into a costly crisis – if you spot any of these warning signs after a storm, take it as a cue to have your roof professionally evaluated. ________________________________________ Frequently Asked Questions (FAQ) Q: How do I know if hail damaged my roof if I can’t see any problems from the ground? A: Hail damage can be sneaky. You might not see obvious issues like missing shingles, but that doesn’t mean your roof is unscathed. Look for indirect signs: dented gutters, downspouts, or roof vents can indicate hail impact. Also check for granules in your gutters – lots of granule loss often means hail hits. However, the safest bet is to have a professional roofer perform an inspection. They know how to spot subtle hail damage (like soft spots or small dimples on shingles) that homeowners can easily miss. Remember, hail bruises can compromise shingles even if they aren’t visibly cracked. A pro can tell you if your Arlington TX roof has hail damage and recommend whether simple repairs or a full replacement are needed. Q: Will my homeowners insurance cover roof repairs after a storm? A: In many cases, yes. Most homeowners insurance policies do cover sudden and accidental damage from storms – this includes damage from hail, wind, and falling debris. If a storm causes harm to your roof, you should be able to file a claim. Be sure to document the damage (photos of dents, missing shingles, interior leaks, etc.) and notify your insurer as soon as possible. They may send an adjuster to inspect. It also helps to have a roofing contractor present during the adjuster’s visit or provide their own assessment, as experienced Arlington TX roofers can point out damage that might otherwise be overlooked. Keep in mind that insurance will typically cover storm-related issues but not maintenance problems or pre-existing wear and tear. And you’ll likely have to pay your policy’s deductible. Texas Republic Roofing has extensive experience working with insurance claims for roof damage – we can help make sure you get the coverage you’re entitled to under your policy. Q: Can I inspect and fix my roof myself after a storm? A: We understand the DIY urge, but use caution. You can and should do a basic visual inspection from the ground or a ladder (if you’re comfortable on one) to spot obvious problems like missing shingles or fallen branches. However, avoid walking on a storm-damaged roof – the structure could be weakened and the surface slippery. It’s also easy to overlook hidden damage if you’re not trained. For instance, you might not spot loosened shingle seals, hairline cracks, or compromised flashing that a professional would catch. Generally, it’s best to call a professional roofing company for a thorough post-storm inspection and for any significant repairs. Improper DIY fixes can lead to bigger issues down the line or even void your roof’s warranty. Bottom line: Do a visual check from a safe vantage point, but leave the climbing and repair work to the pros for your safety and peace of mind. Q: How quickly should I get storm damage repaired? A: As soon as you can. The faster you repair damage, the less chance it has to worsen. For example, if a windstorm blew off a few shingles, getting them replaced within days will likely prevent any water from leaking in. If you already have a leak, that’s an emergency – you should have a roofer install a tarp or temporary patch immediately to stop water intrusion, then perform a proper repair. Delaying fixes can also complicate insurance claims because homeowners are generally expected to prevent further damage after a loss. In storm-prone areas like Arlington, we often get back-to-back weather events, so a “small” issue left open can turn into a big problem with the next rain. Prioritize roof repairs promptly to protect your home and make insurance recovery smoother. Q: What if my roof looks okay after a storm – do I still need an inspection? A: It’s a good idea, especially after significant hail or wind events. Some types of storm damage aren’t obvious until later. Hail can cause micro-cracks or weaken shingles without visibly breaking them, and those shingles might fail months down the road. High winds can lift shingles and then lay them back down, making the damage hard to see, or may have strained the fasteners on your metal flashing. A professional inspection can uncover these issues early. Many Arlington TX roofing companies (including Texas Republic Roofing) offer free post-storm inspections, so it doesn’t hurt to have experts take a look. If nothing’s wrong, you’ll have peace of mind. And if there is damage, you can address it before it turns into leaks or bigger headaches. In short, “looks okay” from the ground isn’t a guarantee – an expert eye can tell for sure.
A Seasonal Maintenance Checklist to Keep Your Roof in Top Condition Spring: Inspect for Winter Wear and Prepare for Storm Season Spring in Texas is a critical time for roof maintenance. Winter may have caused hidden damage, and spring storms can be severe. Inspect shingles for cracking, curling, or missing tabs caused by winter temperature fluctuations. Clear gutters and downspouts of leaves and debris to ensure proper drainage during spring rains. Check flashing around chimneys, skylights, and valleys for separation or corrosion. Examine attic ventilation for signs of condensation or mold. Schedule a professional roof inspection to catch minor issues before storm season intensifies. Texas Republic Roofing includes spring inspections as part of our seasonal service plans, helping homeowners stay ahead of expensive repairs. Summer: Protect Against Extreme Heat and UV Exposure Texas summers are long and scorching. Prolonged UV exposure and attic heat buildup can degrade roofing materials. Look for blistered or buckled shingles, a sign of trapped heat or poor ventilation. Inspect sealants on flashing, vents, and pipe boots. Reapply where dried or cracked. Trim overhanging tree limbs to prevent branch damage during sudden wind gusts. Ensure ridge and soffit vents are unobstructed to maintain airflow. Check for signs of pest intrusion, especially around attic vents. High temperatures are particularly harsh on older roofs. If issues persist, it may be time to consider a roof replacement in Arlington TX. Fall: Prepare for Wind, Rain, and Falling Debris Autumn is an opportunity to fortify your roof before winter and monitor the aftermath of summer stress. Remove leaves, pine needles, and debris from the roof and valleys to prevent water pooling. Inspect gutters again and secure any loose hangers or brackets. Evaluate shingle adhesion—lifted edges can allow water underlayment penetration. Check for loose flashing or fasteners disturbed by summer heat cycles. Schedule a tune-up to fix minor issues and extend roof life before cold weather arrives. Professional roofing contractors in Arlington TX can provide seasonal tune-ups with storm-readiness in mind. Winter: Prevent Moisture and Freeze Damage Though milder than northern states, Texas winters still pose risks. Cold snaps, freezing rain, and high winds can exploit existing roof vulnerabilities. Inspect the attic for signs of moisture, frost buildup, or sagging insulation. Look for icicles or ice dam formation, especially around eaves and gutters. Ensure all flashing and seals are secure and watertight. Use a roof rake to clear heavy snow accumulation if rare snowstorms occur. Reassess roof drainage, especially if downspouts freeze or redirect improperly. Homeowners seeking roof repairs in Arlington TX during winter often discover preventable issues stemming from neglected fall maintenance. Year-Round Best Practices for Roof Longevity No matter the season, some roof care habits should be maintained year-round: Monitor your ceiling for stains or sagging that indicate roof leaks. Keep trees trimmed to prevent falling branches and rodent access. Avoid walking on the roof to prevent shingle damage and voided warranties. Document all inspections and repairs to maintain warranty eligibility. Partner with a trusted roofing company in Arlington TX for scheduled inspections and emergency service when needed. At Texas Republic Roofing, we know Texas weather doesn’t wait. That’s why we offer proactive maintenance plans that match the climate's demands and your roof's material type. Our experienced crews understand how to protect every kind of residential roof, from asphalt to metal and tile. Seasonal maintenance is the key to maximizing roof performance, lowering energy costs, and avoiding sudden emergencies. Stay ahead of the weather, and your roof will return the favor with lasting protection.

The Texas summer sun is more than just a minor nuisance – it can turn your attic into an oven and silently wreak havoc on your roof. In a state like Texas where triple-digit temperatures are common, proper roof ventilation isn’t a luxury; it’s a necessity. Without a path for stifling hot air to escape, attic temperatures can soar to over 150°F, radiating heat into your living space and forcing your A/C to work overtime. At Texas Republic Roofing, we’ve seen firsthand how inadequate ventilation leads to warped shingles, high energy bills, and even mold infestations in attics. In this comprehensive guide, we’ll explain how ventilation impacts your roof’s lifespan, attic heat levels, energy efficiency, mold prevention, and indoor comfort. We’ll also explore the best ventilation solutions (ridge vents, soffit vents, attic fans, gable vents, and more) for Texas homes. Additionally, we’ll discuss how ventilation needs can vary for different roof types (asphalt shingle, metal, tile, and flat roofs) and provide practical guidance on identifying ventilation problems and upgrading your system. By the end, you’ll understand why a “breathing” roof is key to surviving the Texas heat and protecting your home. Let’s dive in and help your roof beat the heat! The Texas Heat and Why Roof Ventilation Matters Texas homeowners face unique climate challenges. During our blistering summers, an unventilated attic can trap extreme heat, dramatically raising the temperature of your entire house. That trapped heat doesn’t just make your upstairs rooms uncomfortably warm – it also bakes your roofing materials from beneath, shortening their lifespan. The intense heat in a poorly vented attic will radiate downward, making your air conditioner run constantly just to keep up. Beyond the heat, Texas’s large day-night temperature swings (scorching days followed by cooler nights) create condensation cycles in unventilated attics. Warm, moist air can condense on cooler surfaces overnight, leading to water droplets or a clammy feel inside the attic by morning. Over time, this moisture fosters mold growth and wood rot that can compromise your roof’s structural integrity if not addressed. Proper roof ventilation is designed to combat these issues by creating a continuous airflow through the attic space. Cooler outside air flows in through intake vents (typically at the eaves/soffits) and hot, humid air escapes out of higher exhaust vents (like ridge or gable vents). This constant air exchange keeps the attic temperature closer to the outside ambient temperature and flushes out moisture. The result is an attic that stays drier and significantly cooler – often no more than 15–20°F hotter than the outside air on a hot day, instead of 50+°F hotter as in a heat-trapped attic. The U.S. Department of Energy has found that effective attic ventilation can cut cooling costs by up to 15% in hot climates. In short, when your roof can “breathe,” your whole house feels the difference. Equally important, ventilation preserves your roof’s longevity. Prolonged heat and humidity in an attic will cook the oils out of asphalt shingles and cause wood decking to warp or rot much faster than normal. Adequate airflow extends the roof’s life by preventing shingles from literally baking and warping in the intense heat. We at Texas Republic Roofing have observed that a well-ventilated roof in Texas can last years longer than one with a suffocating attic. For example, one homeowner who added a full ridge-and-soffit vent system saw their new roof projected to last 5–7 years longer than average after the upgrade (thanks to the lower attic temps). Ventilation is truly the unsung hero of a durable Texas roof. Finally, remember that Texas’s climate isn’t just hot – many regions (like the Gulf Coast and parts of East Texas) are also quite humid. Ventilation is crucial for moisture control, even in a hot state. It prevents the buildup of moist air that can lead to mold, mildew, and insulation damage. In an unventilated attic, everyday activities from inside the home (showers, cooking, etc.) send warm moisture upward, where it can condense on rafters if not vented out. In a vented attic, that humidity has a pathway to escape before it causes problems. All of these reasons make roof ventilation a critical component of building longevity in Texas. Neglecting it can lead to costly issues down the line – from higher A/C bills to premature roof failure and extensive repairs. Conversely, getting your attic ventilation right will pay dividends in comfort, energy savings, and roof durability. Benefits of Proper Roof Ventilation in Texas A well-designed attic ventilation system offers an array of benefits for Texas homeowners. Here are some of the key advantages of proper roof ventilation: • Extends Roof Lifespan: Excessive heat and moisture in an unventilated attic accelerate the aging of roofing materials. Shingles may warp, blister, or crack years before their time due to constant baking from below. Similarly, plywood decking can dry out and become brittle, or conversely stay damp and start rotting. Proper ventilation keeps attic conditions balanced, preventing heat damage and moisture buildup so your roof lasts longer. By avoiding the stress of extreme temperatures and humidity, you reduce the need for early roof replacement or frequent repairs. (Think of ventilation as adding years to your roof’s life – a relatively inexpensive “insurance policy” for your roof investment.) • Reduces Attic Heat Buildup: In Texas summers, an attic without ventilation can become a pressure cooker. It’s not uncommon for attics to hit 140–150°F on a 100°F day when sealed up. Proper ventilation expels hot air, keeping the attic significantly cooler. This means on a 100°F afternoon, your attic might be, say, 115°F instead of 150°F. By venting out trapped heat, you lower the overall temperature of your home’s upper levels. A cooler attic means your insulation can work more effectively (it’s not overwhelmed by a huge thermal load) and less heat radiates into your living spaces. The result is improved comfort upstairs and less strain on your air conditioner. • Improves Energy Efficiency: When your attic stays cooler, your air conditioning system doesn’t have to fight against a broiler-hot ceiling. Adequate ventilation reduces the strain on your HVAC, translating into tangible energy savings. Homeowners often notice that the A/C runs less frequently or for shorter cycles once ventilation is improved. In fact, studies show that attic ventilation can trim cooling costs by around 10–15% in hot climates. Over a long Texas summer, that’s a significant reduction in your electricity bills. Ventilation also helps your A/C and ductwork (often located in the attic) operate in a less extreme environment, potentially extending the life of your HVAC equipment as well. Simply put, attic vents are a low-tech way to cut your high electric bills. • Prevents Moisture & Mold: Even in hot Texas, moisture can be a stealthy threat – it can come from indoor sources (showers, laundry, cooking steam) or from occasional damp weather and humidity influxes. Without an escape route, humid air can condense in the attic and lead to mold growth, mildew on wood, and even decay of the roof structure. Proper ventilation keeps humidity in check by continuously exhausting moist air and drawing in drier outside air. This protects your roof deck and rafters from water damage and keeps your insulation dry (wet insulation loses its effectiveness and can lead to ceiling stains). In short, venting your attic is one of the best ways to prevent mold and moisture problems that could jeopardize your home’s structural integrity and your family’s health. A well-vented attic is a dry attic – and mold doesn’t grow in dry conditions. • Enhances Indoor Comfort & Air Quality: Ventilation doesn’t just protect your roof – it also makes your home more comfortable to live in. By removing excess heat, your upstairs rooms stay cooler and more evenly tempered, with fewer hot spots or suffocating stuffiness. Proper attic venting can drop the temperature of interior ceilings, meaning the top floor of your home isn’t significantly hotter than the downstairs. Additionally, ventilation contributes to better indoor air quality. A stagnant, superheated attic can cause any toxins (like plywood off-gassing or lingering odors) to seep downward. By continually cycling the air, a vented attic helps expel indoor pollutants and refresh the home’s air supply. Many homeowners report that improving attic ventilation makes the whole house feel fresher – at the very least, your second floor won’t feel like a sauna every summer night, and that can greatly improve sleep and day-to-day comfort in the Texas heat. Each of these benefits highlights why we at Texas Republic Roofing emphasize ventilation for every roofing project we undertake in Texas. It’s relatively simple to do, yet it delivers outsized returns in performance and longevity. Next, let’s look at the various roof ventilation systems available and how they work to deliver these benefits. Common Roof Ventilation Systems (Ridge Vents, Soffit Vents & More) Effective roof ventilation relies on a combination of intake and exhaust vents. Intake vents draw cool outside air into the attic (usually at the roof’s lower edges), while exhaust vents let hot air escape near the roof’s peak. This creates a convective airflow – cool in at the bottom, hot out at the top. There are several types of vents – both passive (no power needed) and active (mechanically powered) – that can be used on Texas homes. Let’s dive into the most common roof ventilation components and how they work: Ridge Vents (Exhaust at the Peak) A ridge vent runs along the roof’s peak (ridge line) and provides a continuous, low-profile escape route for hot attic air. Essentially, a slot is cut along the top of the roof (on each side of the ridge board) and the ridge vent material (usually a plastic or metal vent with weather baffles) is installed over it, then capped with shingles so it blends in. From the street, you might not even notice a well-installed ridge vent, as it looks like a raised ridge cap. Ridge vents are one of the most effective and popular exhaust vent solutions, especially for pitched roofs with asphalt shingles or similar materials. Because hot air naturally rises to the highest point of the attic, a ridge vent positioned at that highest point allows that heat to escape evenly along the entire ridge. In Texas, we recommend ridge vents with external baffles – these have an angled lip that creates a slight vacuum (Bernoulli effect) when wind blows over the roof, which helps suck even more hot air out of the attic. The baffle also prevents wind-driven rain or debris from pushing into the vent. This is important in our region, where sudden thunderstorms or gusty winds can occur; a baffled ridge vent will resist rain intrusion better. The beauty of ridge vents is that they vent uniformly across the attic. Instead of only having ventilation at a few box vents or a single fan location, every part of the attic along the ridge line can expel hot air. This eliminates hot pockets and allows any humidity that rises up to escape. Of course, for ridge vents to work properly, they must be paired with adequate intake vents (soffit vents). As hot air exits the ridge, it pulls in cooler air from below – but if there’s no intake, the system won’t have a continuous flow (air won’t magically leave if none is coming in to replace it). We’ll cover soffit vents next, but keep in mind a balanced system is crucial: generally, you want equal or slightly more intake vent area than exhaust area for ideal performance. Ridge vents have no moving parts, so they are maintenance-free and silent. Once installed, you typically don’t have to think about them. Just occasionally glance at the ridge to ensure it’s not damaged or obstructed by debris (leaves, etc.). They can be retrofit in many cases – if your current roof lacks a ridge vent, a roofer can cut in the slot and install one, usually during a re-roof or even as an upgrade to an existing roof. Modern building codes and shingle manufacturers often require or recommend ridge vents (or equivalent exhaust) for warranty coverage because of the importance of ventilation. In our experience across Arlington and North Texas, ridge vents dramatically improve attic ventilation when combined with soffit vents – we often see attic temps drop to near ambient after converting a roof with only gable or static vents to a ridge vent system. (Note: Homes with very short ridges or complex roof shapes might supplement or opt for other vent types if continuous ridge venting isn’t feasible. But for most simple gable or hip roofs, a ridge vent is a top choice in the Texas climate.) Soffit Vents (Intake at the Eaves) While exhaust vents like ridge vents get rid of hot air, soffit vents are the critical counterpart that let fresh air into the attic. Soffit vents are intake vents located along the eaves – the underside of the roof overhang, known as the soffit. If you stand under the edge of your roof and look up at the eave, you might see either small rectangular vent grilles spaced every few feet, or continuous strips of perforated aluminum/vinyl if you have a continuous soffit vent. Those are the intake vents pulling cooler outside air into your attic. Soffit vents work on the simple principle that as hot air exits through high vents, new air must replace it. The coolest, driest air available is outside air from under the eaves (shaded and relatively cooler than attic air). By installing vents in the soffit, we create an entry point for this air to be drawn up into the attic. A balanced ventilation system typically has roughly 50% of the vent area as intake (low) and 50% as exhaust (high). In practice, having a bit more intake than exhaust is okay – it prevents drawing conditioned air from the house. Soffit vents ensure your ridge vent (or other exhaust) isn’t trying to pull air from your living space. Instead, it gets an ample supply from outside. There are a couple of soffit vent styles common in Texas. Continuous soffit vents run as long strips of vented material along the whole eave length. These provide very uniform intake distribution – every rafter bay gets airflow. Other homes use individual soffit vent covers (like 6″x12″ or similar size rectangles) spaced every few feet between rafters. Both styles can work well as long as the total vent area is sufficient. Continuous vents tend to look cleaner and allow maximum air in. If your home has no overhang or very narrow eaves (which can happen on some older homes or certain architectural styles), alternatives like vented fascia (vents on the vertical face of the eave) or roof-edge vents (a special vent strip at the roof edge under the shingles) can be used to provide intake. But for most pitched roofs in Texas, we have some soffit area to work with. A common issue with soffit vents is blockage by insulation. When adding attic insulation, it’s critical to keep the eave areas clear so that soffit vents aren’t accidentally covered. This is often done with baffles or rafter vent chutes – these are installed where the roof meets the attic floor to hold back insulation from covering the soffit openings, ensuring a clear channel for air. Homeowners should periodically check (or have an inspector check) that birds haven’t nested in soffits and that paint or dirt hasn’t clogged the vent perforations. We’ve seen attic vents painted over during remodeling, which drastically cuts airflow until reopened. Also, if you’re in a new subdivision, sometimes soffit vents can be inadvertently blocked by wind-blown insulation (if the builder didn’t install baffles properly). It’s worth a look if your attic seems overly hot despite having vents. Remember, intake is half of the ventilation equation – without it, exhaust vents won’t perform. Industry standards (like FHA/IRC code) typically call for 1 square foot of net free vent area per 150 square feet of attic floor, split between intake and exhaust (that ratio can be relaxed to 1:300 if certain vapor barriers are present). The key takeaway: you want plenty of soffit venting. Texas Republic Roofing always ensures when we do a roof or ventilation upgrade in Arlington that the soffit vent area is adequate or we add more if needed. With ample soffit vents, your attic will have a steady supply of cooler air to flush out heat and moisture effectively. Gable Vents (Traditional End-Wall Vents) Gable vents are another form of passive vent found on many Texas homes, especially older ones built before ridge vents became commonplace. These vents are installed on the gable ends of the attic – the triangular upper wall on each end of a peaked roof. Gable vents are usually louvered openings (they can be decorative shapes like half-moons, triangles, or rectangles with slats) that allow air flow through the attic from one end to the other. Gable vents work by letting hot air out of the attic through the ends and can also catch cross-breezes. If wind blows against one gable vent, it can push air into that vent and out the other side, providing a breeze through the attic. In calm conditions, gable vents act somewhat like both intake and exhaust (hot air rises and drifts out of them, drawing cooler air from below or the opposite vent). However, they tend to mainly vent the attic areas near the gable walls. The center of the attic or areas far from the gable ends might not be vented as effectively. This can lead to hot spots at the peak or corners away from the direct line between vents. Many mid-20th-century Texas homes have gable vents often paired with only a few small soffit vents or even without soffit vents. That was the old ventilation strategy. It’s better than nothing, but not as uniform as ridge+soffit systems. Modern codes usually prefer continuous ridge venting for new builds because it’s more effective across the whole roof span. It’s possible to have both ridge and gable vents, but care must be taken: you don’t want to short-circuit the airflow. For example, if you have a ridge vent and open gable vents, the ridge could actually pull air from the gable vents (since they’re easier sources of air than far-away soffits), meaning it’s pulling outside air from one gable and immediately exhausting it out the ridge without drawing from the soffits. This leaves lower attic areas still hot. That’s why many experts suggest if you add a ridge vent, you should consider closing off gable vents or at least ensure soffit intake is dominant. The goal is to have air come from the lowest point (soffits) and exit the highest (ridge). Gable vents can complement if the wind is helping, but they shouldn’t undermine the primary system. Nevertheless, gable vents still play a role, especially on roofs where a ridge vent isn’t feasible (like certain hip roofs with short ridges). They are relatively inexpensive and have no moving parts. They also add an architectural accent – some homeowners like the classic look of a louver on the house’s exterior. To maximize their usefulness, it’s best if there’s an unobstructed attic space between the two gable vents (no partition walls or big HVAC units blocking airflow). And you’ll still want soffit vents to feed those gables with cooler air from below. Gable vents typically have built-in insect screens; just ensure the louvers are intact and screens aren’t clogged with dust or paint. In regions of Texas prone to hurricanes or tornadoes (e.g., Gulf Coast or Panhandle storms), we ensure any gable vent is installed securely because they can be points of failure in extreme winds. Impact-rated vents or shutters are available if needed. For most inland North Texas homes, standard gable vents suffice and are built to handle our typical wind loads. In summary, gable vents offer a simple, passive ventilation option and can be part of a multi-vent strategy. While not as uniformly effective as ridge+soffit, they certainly help vent attics if used correctly. We often end up enlarging or supplementing gable vents when improving an older home’s ventilation: for instance, adding soffit vents below and possibly a small roof vent or two near the peak to assist. The exact solution can vary, but the principle remains: get air in low (soffit) and out high (ridge/gable) for a good convection flow. Attic Fans and Powered Ventilation Not all attic ventilation is passive. Attic fans – also known as powered attic ventilators – use motors to actively force hot air out of your attic. In Texas, where the heat can be extreme and sometimes very still (no wind), some homes benefit from these powered systems to supplement passive vents. There are two main types: electric attic fans (wired into your household power, usually with a thermostat and possibly a humidistat control) and solar attic fans (which have a small solar panel to power the fan when the sun is shining). Both types are typically mounted either on the roof deck (a dome or low-profile unit on the roof that spins or has a fan blade inside) or installed in an existing gable vent opening (gable-mounted fan). Powered attic vents can move a much larger volume of air per minute than passive vents alone, which can significantly lower attic temperatures on those dead-still 100°F+ August afternoons. For instance, a quality electric attic fan might move 1,200 to 1,600 cubic feet of air per minute (CFM). This can exchange the air in an average attic in just a few minutes, rapidly pushing out heat. Solar-powered fans have become especially popular in Texas – with our abundant sunshine, the fan naturally works hardest when it’s hottest (since the sun powers it more). Modern solar attic fans often come with adjustable thermostats and some even with electronic controls to avoid running when not needed. They have zero operating cost once installed, and installation is simpler since there’s no wiring into the house circuit (you just cut a hole and mount them, basically). Electric fans, on the other hand, run off your home’s electricity and typically are controlled by a thermostat switch (and sometimes a humidistat for moisture control). You might set it to turn on at, say, 100°F attic temp and off below 90°F. These are effective even during times of low sunlight or at night if humidity is high. They do consume a small amount of electricity, but if properly set, the cost is relatively low (and usually outweighed by A/C savings). However, they do require an electrician or experienced installer to hook into your power supply safely, and you need to be mindful of the thermostat setting to avoid running too much. While powered ventilation can be extremely effective in Texas, it must be used wisely. One key caution: always ensure adequate intake vent area is available when you use an attic fan. A powerful fan without enough soffit vent supply will start pulling air from wherever it can – that might be from your house’s interior (through gaps in ceiling light fixtures, attic hatch, etc.), which means it could actually suck your cooled air out of the living space (not what you want!). In worst cases, a too-strong fan in a tight attic could create negative pressure that backdrafts gas appliances or pulls in outside air through wall cracks in an uncontrolled way. To avoid this, a general rule of thumb is to have about 1 square foot of intake vent area for every 300 CFM of fan capacity (some experts say even more). Most fan manufacturers specify the minimum intake venting needed. For example, a 1200 CFM fan might need at least 4 sq ft of net free intake area (which is roughly 16 standard soffit vent panels or about 40 linear feet of continuous soffit vent). Additionally, one should avoid mixing active and passive exhaust in ways that conflict. If you already have a ridge vent or multiple static roof vents, a centrally located attic fan might simply draw air from those higher vents (short-circuiting the airflow from soffits). This can leave far corners of the attic still hot. Solutions include either (a) closing off or reducing other exhaust when using a fan (for instance, some people cover gable vents when running a roof fan to force it to draw from soffits), or (b) using a fan strategically in an area of the attic that was not well-served by existing vents. In some cases, we install automatic shutters on gable vents that open only when a fan runs – so if the fan kicks on, it draws through that gable intake and pulls from soffits, not from the ridge. It can get a bit technical to ensure you’re improving the situation and not creating a new inefficiency. Maintenance for attic fans is also a consideration: electric fans have motors and bearings that can wear out after some years, and even solar fan units can fail or get their solar panel dusty. They should be checked periodically to ensure they’re operating correctly. You don’t want a failed motor sitting there – it becomes just an obstacle to passive venting if it’s not spinning. Listen for your fan on a hot day; if it’s silent when attic is, say, 110°F, the motor or thermostat might have failed. Replacing a motor or a whole fan unit might be needed every 5-10 years depending on quality. Also, any roof penetration (including fan housings) must be properly flashed and sealed to prevent leaks. Professional installation is recommended to ensure it’s weatherproof. In summary, powered attic ventilators can be a potent weapon against Texas attic heat, actively flushing out hot air in a way passive vents sometimes cannot during still weather. They are particularly useful for larger attics, homes with complex roof shapes (where passive venting leaves some dead zones), or situations where even with good passive vents, the attic temperature is still high and affecting comfort. However, they should be implemented carefully – with sufficient intake vents and coordination with passive systems. When properly installed (for example, a solar fan near the ridge combined with plenty of soffit vents), Texas homeowners can see a noticeable drop in attic temperatures and improved comfort in the home. We often find that adding a well-placed attic fan in an older home can drop attic temps by 20°F or more, which directly translates to cooler indoor temps and energy savings. Passive vs. Powered Ventilation: Choosing the Right System Now that we’ve covered individual vent types, you may wonder: should I rely solely on passive ventilation, or should I incorporate powered ventilation in my Texas home? The answer depends on your roof design, local climate conditions, and personal goals for efficiency and cost. Let’s compare passive vs. powered systems: Passive Ventilation (ridge vents, soffit vents, gable vents, turbine vents, etc.): Passive systems rely on natural forces – warm air rising (convection) and wind pressure differences. They have no motors, no energy usage, and usually very low maintenance. A properly balanced passive system works continuously day and night as long as there’s a temperature or pressure difference to drive it. In Texas, a well-designed passive system (e.g., continuous ridge and soffits on a simple gable roof) can handle most of the ventilation needs and will function even during power outages. Passive vents also pose little risk of drawing conditioned air out of your home because the airflow is gentler and self-regulating. The downside is passive systems can be less effective if your roof has dead-air pockets (complicated shapes where air doesn’t flow as well), or during times when there’s absolutely no wind and only minimal stack effect – on extremely still, hot days, passive vents might not expel heat as fast as desired. Still, passive venting is usually sufficient for many homes if done right, and it has the advantage of simplicity. Powered Ventilation (attic fans, electric or solar): Powered systems actively move air and can provide greater airflow on demand. They are effective for quickly reducing attic temperatures and can be critical for very large attics or ones with multiple sections that don’t vent well passively. In Texas, powered fans can help particularly in those late afternoon hours when the attic is at its peak heat and there’s no breeze. Solar fans offer a nice middle ground – they require no external power and automatically ramp up with the sun’s intensity. The downsides of powered systems include higher initial cost (fans + installation), potential maintenance (a motor can fail, whereas a ridge vent cannot), and the need for careful design to avoid the issues of negative pressure or vent short-circuiting we discussed. Electric fans will add a bit to your electric bill, although if set properly, the cost is small (and offset by A/C savings). It’s worth noting: if your attic is very well-insulated at the floor and you don’t have ductwork up there, the energy savings from cooling the attic with a fan might be modest – because not much heat is getting into the living space anyway. Much of the benefit of fans comes when attics are under-insulated or contain HVAC equipment that you want to keep cooler. So every home is different. In many cases, the best solution is a balanced passive system – sufficient ridge or roof vents combined with plenty of soffit intake – which meets building codes and is often enough for good performance. Passive systems have fewer failure points and cost nothing to operate. That said, if after installing proper passive vents your attic still runs extremely hot, or if your roof geometry doesn’t allow enough passive vent area, a powered fan can be added to boost ventilation. We just recommend not going overboard: more vents are not always better if they start to interfere. For example, you wouldn’t install ridge vents, several electric fans, and keep gable vents all wide open together because they’ll likely disrupt each other’s airflow patterns. A streamlined approach is best: pick a primary exhaust method and ensure adequate intake. From our experience at Texas Republic Roofing, we often assess existing attics and find that a few strategic changes can make a big difference. Sometimes adding a continuous ridge vent (and making sure soffits are clear) instantly improves airflow and lowers attic temps by itself. Other times, especially on complex or expansive roofs, we might add a solar attic fan on a section of roof that was prone to heat buildup (like a closed-off gable or a wing of the house) to actively pull air through that zone. We always check intake vents first – many attics in Texas simply don’t have enough soffit venting, which is a low-hanging fruit to fix (often by installing additional soffit vents or converting small vents to continuous strips). Bottom line: For most residential roofs in Texas, passive ventilation (ridge + soffit) is often sufficient and has the advantage of no energy use or noise. Powered ventilation can be a great addition for larger homes or extreme heat situations, provided it’s implemented with care to avoid pulling conditioned air or causing other issues. And in all cases, ensure compliance with local building codes on ventilation (most follow the IRC which outlines the vent area ratios mentioned) and consider consulting a professional roofer if unsure. An experienced contractor can calculate your attic’s vent area needs and recommend the ideal solution, so you get the benefits of ventilation without unintended side effects. Ventilation Considerations for Different Roof Types Every home is a little different, and ventilation isn’t a one-size-fits-all scenario. The ideal venting strategy can vary depending on your roof’s design and material. Let’s examine how ventilation applies to four common roof types in Texas: asphalt shingle roofs, metal roofs, tile roofs, and flat roofs. Each of these has unique characteristics that influence how we approach attic ventilation: Asphalt Shingle Roofs Asphalt shingle roofs are by far the most widespread roofing type in Texas residential construction. These roofs usually have an attic space beneath the decking (unless it’s a cathedral ceiling design). They absolutely require good ventilation for longevity – in fact, shingle manufacturers often make proper attic ventilation a condition of their warranty. Asphalt shingles can suffer tremendously from heat buildup. When an attic is not vented, the trapped heat can literally cook the shingles from underneath, causing them to age prematurely. You might see shingles curling at the edges, blistering on the surface, or cracking – these can all be symptoms of excessive attic heat frying the shingle oils and structure. In extreme cases, we’ve seen relatively new shingles (just 5-8 years old) in Texas look 20 years old because an attic had virtually no ventilation and routinely hit 150°F+. Proper ventilation will prevent these issues by keeping the attic (and thus the underside of the roof deck) cooler. For a typical gable-roofed Texas home with shingles, the recommended ventilation system is ridge-and-soffit vents. A continuous ridge vent along the peak, paired with continuous soffit vents at the eaves, creates an efficient convection cycle that ventilates the entire roof deck uniformly. This is crucial for avoiding hot spots that might otherwise shorten the roof’s life. If ridge vents are not present on an existing shingle roof, adding them during your next re-roof is highly advised (and usually straightforward). We have performed many such upgrades during roof replacements in Arlington, where we remove old static vents or turbines and cut in a ridge vent – homeowners often immediately notice their attic is cooler the next summer, and their HVAC runs less. It’s a standard practice now in new builds to do ridge + soffit because it works so well. Another consideration for shingle roofs is insulation and vapor barriers. Attic insulation is essential for energy efficiency, but it must be installed with ventilation in mind (use those baffles at eaves to keep airflow). If your home has a very tight building envelope (vapor barriers or spray foam at the attic floor, etc.), the ventilation needs might differ (some sealed attic designs intentionally avoid venting and instead condition the attic – that’s another approach, albeit not common in older homes). But for most vented attics, you want to ensure the 1:150 rule of thumb for vent area is met. Dark-colored shingles will also absorb more heat than light-colored ones, making ventilation even more crucial to dissipate that solar gain. For instance, a black roof might run significantly hotter than a white or light gray roof, so the vents have to work overtime – definitely make sure you have sufficient intake in that case. To illustrate, we had a client in Arlington, TX with a dark shingle roof and minimal venting. In summer, the attic exceeded 140°F and the second floor was almost unlivable. We retrofitted soffit vents (there were none) and added a ridge vent. The attic temperature dropped by about 20°F and the homeowner reported that the upstairs was noticeably cooler, plus their electric bill went down by around 10-15%. The shingles will also thank us by lasting their full lifespan. This is the kind of real-world result that underscores how vital ventilation is for asphalt roofs here. In summary, asphalt shingle roofs in Texas should be ventilated according to code or better. A balanced system, usually ridge plus soffit, is the gold standard. If your shingle roof only has gable vents or a few “turtle” vents (box vents), consider upgrading – it can add years to the life of your roof and save on cooling costs. And always address ventilation during any shingle roof repair or replacement; it’s the ideal time to improve it. Our experienced roofing team at Texas Republic Roofing will always check attic venting as part of a roof project and recommend additions if needed, ensuring that your new shingle roof isn’t put at risk by an overheated attic. Metal Roofs Metal roofing is prized for its durability and its ability to reflect a good portion of the sun’s radiant heat (especially if using light colors or reflective coatings). Many Texas homeowners choose standing seam or metal panel roofs for longevity and energy efficiency. However, having a metal roof doesn’t eliminate the need for attic ventilation. In fact, ventilation is still vital for metal roofs to control condensation as well as heat. One characteristic of metal roofs is that the metal panels cool down very quickly at night – faster than asphalt shingles once the sun sets. If the attic beneath is not vented, that rapid cooling of the roof skin can cause moisture in a warm attic to condense on the underside of the metal. You might get “attic rain” or dripping if enough water condenses. Over time, recurring condensation can lead to issues like damp insulation, mold, or even corrosion of metal panels and fasteners from the inside. A well-ventilated attic will expel moist air before it condenses, keeping the underside of the metal roof dry. This is particularly important in humid parts of Texas or if a homeowner generates a lot of indoor humidity. For venting a metal roof, the approach isn’t very different from a shingle roof: ridge vents and soffit vents remain highly effective. Many metal roof systems have compatible ridge vent systems that integrate under the ridge cap of the metal panels, allowing hot air out while keeping rain out (often using mesh or pre-formed vent pieces that match the metal profile). We make sure to use vent components designed for metal roofs, including closure strips that allow venting but stop water. Intake is provided via soffit vents just the same as with shingles. If the home’s architecture allows, gable vents can supplement a metal roof’s ventilation, but generally if ridge + soffit are present, that’s sufficient. Another aspect is that metal roofs often sit on solid decking with underlayment in residential applications (similar to shingles, though underlayment might be upgraded to a high-temp synthetic or a radiant barrier). Ventilation helps keep that deck and underlayment from accumulating moisture or overheating. In some installations, metal roofs might be mounted on battens or purlins above the deck, creating an air gap between the metal and the deck – this is known as above-sheathing ventilation. Essentially, the metal roof is vented underneath, which can further reduce heat transfer into the attic (a technique used in some energy-efficient builds or retrofits). If your metal roof is installed this way, it’s beneficial for reducing heat, but you still need to vent the attic space below the roof deck as well. Think of it as two layers of ventilation: one directly under the metal (if designed that way) and one in the attic below. Combined, they can make metal roofing exceptionally cool in hot weather. Some studies have shown that a vented metal roof (with an air gap) can reduce cooling loads significantly compared to a directly applied roof, because it breaks the heat path. One thing to watch with metal roofs is air sealing. Because metal roofs are often installed with ridge caps and such, sometimes installers will use solid closures at ridges that don’t allow venting (if they aren’t doing ridge venting). Ensure that if you intend to vent, the ridge is installed with vent pieces, not sealed up. Same for hip ridges on hip roofs – you might need vented hip pieces. Metal roofs are known for longevity (40-50 years or more). To ensure your attic ventilation lasts that long too, we choose vent components that are equally durable – for instance, aluminum or stainless steel vent screens that won’t rust out in 10 years. The last thing you want is your metal roof going strong but your vent system failing. With proper venting, metal roofs in Texas have a huge advantage: they reflect a lot of heat and then quickly shed what they do absorb once the sun is down, especially if the attic can breathe. Just don’t neglect the ventilation part – a metal roof on an unventilated attic could still get extremely hot underneath and cause the same problems as any other roof. A properly vented metal roof system will keep your attic cooler and drier, maximizing the roof’s lifespan and your comfort. Tile Roofs Tile roofs (whether clay “Spanish” barrel tiles, concrete S-tiles, or even slate roofs) are common in parts of Texas, especially where a Southwestern or Mediterranean aesthetic is popular (e.g., parts of DFW, Austin, San Antonio have many tile roofs). Tiles are heavy and robust, and they naturally provide an air gap between the tile and the roof deck. Each curved tile creates a channel underneath it. This gap can actually contribute to ventilation above the underlayment: air can flow under the tiles from the eave to the ridge (if not sealed), dissipating some heat before it ever reaches the roof deck. This is one reason tile roofs often keep attics cooler – the roofing itself doesn’t lie flat on the deck, so there’s a ventilated space that carries away heat (and also any water that gets under tiles can evaporate or drain out). However, the attic below the deck in a tile-roofed home still benefits from a deliberate ventilation system. Just as with other roofs, we want intake vents (soffits usually) and exhaust vents (ridge or others) to cycle air through the attic. Many newer tile roofs include ridge vents similar to shingle roofs, but covered with ridge cap tiles so they maintain the look. The principle is the same: let the hot air escape at the top. If a continuous ridge vent is not used on a tile roof (some older tile roofs might not have them), often static roof vents or Dormer vents (sometimes called eyebrow vents) color-matched to the tile are installed near the upper third of the roof as exhaust. Additionally, some tile roofs use specialty tile vents – these are individual vented tiles that allow air out (or in) at certain intervals. They often look like a slightly raised tile or a tile with an opening covered by a grille, placed strategically across the roof. They are not as continuous as a ridge vent but can add ventilation in a less visible way. Why ventilate if tiles naturally vent above the deck? The key reason is protecting the underlayment and structure. Tile is a fantastic roof covering for durability and heat tolerance (the tiles themselves can handle the sun and heat without much damage, and they don’t really degrade like shingles do). But tiles are not the waterproof barrier – the underlayment (felt or modern synthetic or a membrane) underneath the tiles is what actually keeps water out of your home. That underlayment is typically a heavy-duty felt or multiple layers, and it can deteriorate under high heat over time. In an under-ventilated attic, the underlayment gets “cooked” between a hot attic below and hot tiles above, which can shorten its lifespan and lead to leaks even if the tiles themselves last forever. Proper attic ventilation helps keep the underlayment and decking cooler and drier from beneath, which in turn prolongs its life and maintains the overall system integrity. This is why even with tile’s above-sheathing airflow, we ventilate the attic underneath – you don’t want the wood deck and underlay baking and moistening. Another concern in Texas is that some tile roofs are installed on homes without large soffits. If soffit intake is limited (perhaps due to the architecture of stucco walls and small or no eave overhangs, which is common in some Southwestern styles), we might need to use alternative intake methods like over-fascia vents or small eave vents. Sometimes, the design of the house may include vented starter tiles or gaps at the eaves to allow air in. Each house is a bit custom in this regard. The important part is to ensure air can come in low and escape high. The good news is tile roofs themselves are highly “breathable” in the sense that air can move under and through them more freely than through an airtight shingle layer. In fact, research has shown that ventilated tile roofs (the natural air space plus attic venting) can reduce heat transfer into the attic significantly compared to unventilated roofs – especially if combined with something like a radiant barrier deck or high R-value insulation. So, tile roof homeowners should leverage that inherent advantage by also venting the attic well. In summary, for clay or concrete tile roofs in Texas, ensure you have functional attic vents just as you would with other materials. A ridge vent with appropriate ridge cap construction is ideal because it’s at the highest point and can be done discreetly. If that’s not possible (due to aesthetics or construction), use a combination of other vents: maybe some high roof vents or gable vents, or those tile vents to get the hot air out. And maintain your soffit intakes or equivalents for airflow. A tile roof is often a premium investment – protect that investment by ventilating the structure beneath, keeping your home cool and the roof assembly dry. With tiles, you likely already have an advantage in summer cooling due to the above-sheathing ventilation; proper attic venting will amplify that, while safeguarding the unseen layers of your roof system (the wood and underlayment that actually need the protection). Flat Roofs Flat roofs (or very low-slope roofs) present a special case for ventilation because often there is little to no attic space. Many flat-roofed homes in Texas have minimal attic clearance – sometimes it’s just a small cavity or the roof joists are filled with insulation with no open attic at all. Traditional attic ventilation strategies (ridge and soffit vents) aren’t applicable if there’s no real attic or no high point to exhaust from. However, if you do have a flat roof with some kind of attic or crawl space above the ceiling, ventilation is still important to remove heat and moisture from that cavity. For flat roofs with an attic cavity, one common solution is using box vents (a.k.a. turtle vents or static vents) or mushroom vents spaced across the roof as exhaust. These are low-profile vent caps that allow hot air out through the roof deck. Intake air can come from vents in the soffit (if any) or from vents in the parapet walls (if it’s a flat roof with raised parapet edges). Another method is edge vents at the roof perimeter: certain flat roof designs include vent slots at the edges that let air in, combined with roof vents to let air out. If the flat roof covers a large area, sometimes multiple vents or even fans are needed to achieve airflow across it. That said, building codes often allow flat or cathedral roofs to be unvented if certain conditions are met. For example, if you have a hot roof design (spray foam insulation directly under the roof deck, sealing the attic completely), then you intentionally do not ventilate the space. Many modern flat roofs in hot climates like Texas actually go this unvented route: they install high-R insulation (often foam board or closed-cell spray foam) on top of or directly below the roof deck and make the roof assembly air-tight. This can work well to prevent condensation (by keeping the roof deck from getting cold enough to reach dew point) and obviously eliminates the need for vents. The inside of the roof basically becomes part of the conditioned space or at least isolated from interior moisture. However, it must be done correctly – especially moisture control and using the right type of insulation – otherwise you can trap moisture inadvertently. If you have an older flat roof home with a vented attic space (even a small one), check that the existing vents are clear and sufficient. Often, older flat-roof designs in Texas might have only a couple of turbine vents or electric fan due to the difficulty of passive venting. Those can help, but we want to ensure they have intake. If there’s a small soffit or gap at the perimeter, that’s your intake – make sure it’s not clogged. If the attic is just a shallow void, sometimes adding a solar attic fan can boost air movement effectively (since passive flow is weak in a short height space). For example, a flat-roofed mid-century home might have a central hall closet attic hatch – above that the space might only be 2 feet high at most. A couple of small wind turbines or a low-profile powered fan could do a lot to suck out hot air that otherwise just sits there. One particular issue to watch with flat roofs is moisture accumulation because flat roofs don’t have gravity helping to shed water or moisture as quickly as pitched roofs. Any condensation or minor leak can be more problematic since water might not drain away and instead spreads out. Good ventilation (or a properly sealed unvented design) helps prevent moist air from lingering up there. If you notice signs of moisture – like brown spots on the ceiling, a musty smell, or mold in upper corners of rooms – it could be a sign that moisture is trapped in a flat roof assembly. Ventilation is one thing to consider, alongside checking for leaks. To recap, ventilation for flat roofs is tricky but still feasible when needed. If your flat roof was built to be vented (some older ones were, with little vents at ends or corners), ensure those vents are open and maybe consider adding a small powered vent to help. If your flat roof is designed to be unvented (insulation at roof deck, no attic), then focus on air sealing any gaps from the house to that space (to keep moist air from entering) and ensure the insulation is adequate to prevent condensation. This is a case where professional advice is useful because mistakes can lead to moisture problems. At Texas Republic Roofing, we have experience with both vented and unvented flat roof designs. Sometimes during a flat roof replacement, we convert a poorly vented flat roof into a sealed insulated roof deck (hot roof) to simplify and solve moisture issues. Other times, we add vents where possible to improve an attic cavity. It really depends on the specific structure and what’s practical. In the end, the goal for flat roofs – as with any roof – is a cool, dry roof assembly that stands up to the Texas heat. Whether achieved through ventilation or an unvented design, we want to avoid that oven effect and prevent condensation. If you’re unsure about your flat roof, consult with a roofing pro who understands thermal dynamics. The solution might be adding a solar fan, or it might be spraying foam insulation – but a careful evaluation will determine the best course. Signs of Poor Roof Ventilation How do you know if your attic is under-ventilated? There are several warning signs and symptoms that Texas homeowners should watch out for. Catching these early can save you from bigger headaches down the road. Common signs of inadequate roof ventilation include: • Excessive Attic Heat: If you venture into your attic on a warm day and it feels like a sauna or unbearably hot compared to outside, that’s a red flag. While attics do run warmer than the outdoor air, they shouldn’t be scorching. An attic that stays extremely hot even in the evening (long after the sun sets) indicates poor airflow – the heat is not escaping. You might also notice the upper floors of your home staying very warm or the A/C struggling; heat trapped in the attic can radiate down, so if your upstairs is always sweltering, ventilation could be an issue. • High Cooling Bills & A/C Strain: Poor ventilation often manifests as sky-high energy bills in summer. Your A/C might run almost nonstop and still struggle to keep the house cool because a superheated attic is counteracting it. If you see unusually high summer electric bills or your HVAC seems to be constantly running or cycling frequently, an overly hot attic (due to insufficient venting) might be a cause. This goes hand in hand with the attic heat sign above – essentially, you’re paying to cool an oven on top of your house. • Mold, Mildew, or Moisture in the Attic: Take a flashlight and inspect your attic’s wood framing and insulation if possible. Do you see any signs of mold spots (dark or greenish patches) or mildew, especially on the underside of the roof deck or on rafters? Is any insulation damp or matting down as if it’s gotten wet before? These are strong indicators of condensation problems from trapped moisture – likely because the attic isn’t venting humidity effectively. You might also notice a musty odor in the attic or even in rooms below (especially if you have ceiling vents or lights that communicate air from the attic). In Texas, mold in the attic can occur if humid air from the house (or outside on a humid day) gets stuck up there and condenses. Another clue is rusty nails: if the tips of nails protruding through the roof deck are rusty or have condensation droplets on them, the attic air is too moist. Proper venting would sweep that moist air out before it can condense. • Premature Roof Deterioration: Your roof itself may show signs of poor ventilation. For asphalt shingles, look for curling, blistering, or cracking shingles, especially if they’re relatively young (say you put on a 30-year roof 10 years ago and it already looks bad). Overheated shingles often curl up at the edges or develop blisters (little pockmarks where granules have popped off). You may also see uneven coloring or dark patches where shingles are aging faster (often higher up on the roof where heat gets trapped). Additionally, check the soffits and eaves on the outside of your house – peeling paint or rotting wood around soffits can occur if moisture is being pushed out there due to lack of attic venting (humid air finds any escape and condenses on wood). Inside the attic, if a roofer notes that your plywood decking is brittle or shows signs of dry rot during an inspection, that could result from chronic attic heat and moisture cooking it. Essentially, your roof might “tell” you it’s ventilated poorly by aging too soon and in specific patterns (like only the top half of the roof is curled – pointing to heat at the ridge). • Ice Dams in Winter: While Texas is mostly hot, we do get the occasional winter freeze or even snow in the Panhandle or northern parts of the state. Ice dams (icicles and ice buildup along the eaves) are a classic sign of poor attic ventilation and insulation imbalance. They happen when a warm attic melts snow on the roof, which then refreezes at the cold eaves, forming ice that can creep under shingles. If you ever observe ice damming on your roof during a cold snap, it’s a signal that attic heat isn’t being vented properly (and/or you need more insulation). Ice dams are relatively uncommon in most of Texas due to infrequent snowfall, but even heavy frost consistently melting in a pattern on your roof could hint at warm spots from lack of venting. Ideally, a vented attic keeps the roof deck cold in winter, so snow doesn’t melt unevenly. • General Stuffiness or Poor Air Quality Upstairs: If the upper floor of your home feels stuffy, stale, or you notice lingering odors and no fresh air, it could be that your attic (and by extension your home) isn’t “breathing” as it should. Proper attic ventilation can actually help a bit with overall home ventilation – especially if you have a whole-house fan or just natural leakage. An unventilated attic can cause the upstairs to feel oppressive. While this is a less concrete sign than mold or high bills, many homeowners sense that their house feels fresher after fixing ventilation issues. Another anecdotal sign: if you open the attic hatch on a hot day and you feel a whoosh of very hot, stuffy air (almost like opening an oven), that indicates that air has been stagnating up there. If you recognize one or more of these signs, it’s time to take action. Ignoring ventilation problems can lead to escalating damage – what starts as a bit of mildew could turn into widespread mold remediation, and a minor roof wrinkle could turn into major roof repairs or early replacement due to material failure. The good news is that ventilation issues are usually very solvable with the right approach, as we’ll cover next. Installing or Upgrading Roof Ventilation in Texas Addressing ventilation problems can involve adding new vents, upgrading existing ones, or even redesigning your attic’s airflow strategy. Whether you’re improving an older home or ensuring a new build is up to modern standards, here are some guidelines and steps for installing or upgrading roof ventilation in the Texas climate: 1. Evaluate Your Current Ventilation: Start with an inspection of what vents you already have and how your attic behaves. On a sunny afternoon, safely peek into your attic – is it sweltering? Identify the types of vents present: do you see ridge vents along the peak? Soffit vents under the eaves? Any gable vents on end walls? Maybe turbine vents or static roof vents? Also check if any existing vents are blocked (for example, clogged soffit screens or covered ridge vents). Measure or estimate your attic’s square footage. A general rule (per code) is about 1 square foot of net vent area for every 150 square feet of attic floor (1:150 ratio, split ideally 50/50 between intake and exhaust). If your attic has a vapor barrier in place, code may allow 1:300, but with Texas heat we prefer more venting rather than less. Many older homes fall far short of even 1:150. Also look for signs of trouble as mentioned: mildew, rust, extreme heat, etc. This evaluation might be done by yourself or ideally by a professional roofer or home energy auditor. They can also use tools like thermal imaging to see hot spots, or a hygrometer to measure attic humidity. 2. Plan a Balanced Ventilation System: Decide on the types and placement of vents to achieve balanced intake and exhaust. In most cases for Texas homes with pitched roofs, the ideal plan is continuous soffit intake vents combined with a continuous ridge vent for exhaust. If a ridge vent isn’t possible (e.g., your roof has no ridge or a very short ridge relative to size), then plan for adequate roof vents or gable vents as exhaust. Calculate roughly how much vent area you need. For example, if your attic is 1200 sq ft, 1:150 means about 8 sq ft of net free vent area total. Half of that (4 sq ft) should be intake, half exhaust. Continuous soffit vents typically provide about 9 square inches of net area per linear foot (varies by product). Ridge vents often provide 12-18 sq inches per linear foot. So to get 4 sq ft (576 sq inches) of ridge vent, at 18 sq inches/ft, you’d need ~32 feet of ridge vent. That’s achievable on a roof that, say, has a 40 foot ridge (accounting for some loss at ends). Intake would need similar – 576 sq inches, which could be 64 linear feet of soffit at 9 sq in/ft (32 ft on each side of house, for instance). These numbers are just illustrative – actual vent products differ, and more is generally fine (it’s hard to have “too much” intake). If your roof is hip-shaped (no long ridge), you might plan for several roof exhaust vents spaced near the top. If you have a flat roof with parapets, maybe plan for edge vents and roof vents. The key is ensure roughly equal intake and exhaust and distribute them appropriately. 3. Install or Upgrade Exhaust Vents: Tackle the high-point ventilation first. If you’re doing a roof replacement, that’s the perfect time to add or enlarge ridge vents along the new roof’s peak, since the decking is accessible and old caps are off. If the roof is not being replaced, you can still retrofit a ridge vent by cutting back shingles and the deck along the ridge and installing the vent – this is best done by a professional roofer to ensure it’s watertight and the structure isn’t compromised. Alternatively, add roof-mounted vents or turbines. For instance, if you don’t have a ridge, you might install a series of box vents (sometimes 1 per 300 sq ft of attic as a guideline) near the roof peak. Space them evenly for broad coverage. If you prefer turbines (the spinning vents), a few turbines can move a lot of air when it’s breezy. Ensure they have internal bracing for high wind areas so they don’t rattle. If you have gable walls and no ridge, you could install gable vents or enlarge existing ones to serve as exhaust (ideally paired as one on each end for cross-flow). Another option is to incorporate a powered fan at this stage: for example, installing a solar attic fan on a south or west-facing slope near the top can actively pull out hot air (but remember to account for intake as next step). Follow all manufacturer guidelines for flashing and placement – typically, roof vents are installed below the ridge (with ridge vents, at the ridge itself). For gable fans, it might attach to the existing gable vent frame. 4. Install or Improve Intake Vents: No exhaust upgrade will work well without sufficient intake. So, ensure your soffit vents are clear and adequate. If your home currently has solid soffits (no vents at all), you should install vents there. This could involve cutting slots in wooden soffits and inserting screened vent strips, or if you have vinyl/aluminum soffits, replacing some solid panels with vented ones. Aim to distribute intake vents along the entire eave length, especially focusing on areas below major roof spans. Continuous soffit vents are great because they give uniform airflow. If continuous isn’t possible, put individual vents every few feet. If your roof has no overhang or very narrow soffit, consider alternatives: vented drip edge (a product that has vent holes and installs at the roof edge under shingles), or mini soffit vents in the fascia. In some homes, undereave vents on walls just below the roof line can be used. The goal is to get cool air entering low in the attic. Ensure the total intake vent area meets or (ideally) exceeds the total exhaust area you planned. For instance, if you added 32 feet of ridge vent (~576 sq in NFA, using earlier example), try to add at least that much net area in soffits – maybe 64 feet of continuous vent at 9 sq in/ft gives ~576 sq in. If you can do more intake, great. This step often requires working along the house eaves, which might be high up – use caution on ladders or hire a pro. A pro can also use a saw or drill with a hole saw to cut into wood soffits cleanly and install pre-fab vent covers neatly. 5. Ensure Proper Installation and Code Compliance: All vent products should be installed according to their instructions and with proper flashing where required. For example, a ridge vent installation involves using the right cap shingles or metal ridge cap, and possibly hand-nailing them to avoid over-pressuring the vent material (if using a nail gun, one must be careful). Roof penetrations like box vents or fans need to be flashed into the shingles just like a plumbing vent would be – slid under the upper shingles, nailed and sealed on the sides, etc. Leaks are not common if vents are installed correctly, but poor installation can lead to rain intrusion, so it’s critical to do it right or have a qualified roofer handle it. In hurricane-prone parts of Texas or high-wind areas, use vents rated for those conditions (for instance, some ridge vents are Miami-Dade approved for high wind; they have extra baffles or nailing requirements). Also, if you have a fireplace or furnace flue in the attic, keep vents at least a few feet away to ensure proper draft for the flue (and so rain doesn’t blow onto a hot flue via a vent). Building codes in Texas cities generally follow the International Residential Code, which, as mentioned, requires attic venting (either 1:150 or 1:300 if certain conditions). By following best practices and using quality vent products, you’ll meet or exceed code. If you pulled a permit for a re-roof, the inspector will likely check that venting meets the requirements (especially if you significantly changed venting). Texas Republic Roofing always includes code-required ventilation when we do roofing jobs – and often we go beyond minimum because it’s relatively low cost to do so and benefits the homeowner. 6. Complete the Work Safely (Usually with Professional Help): Climbing onto roofs and cutting holes in them can be dangerous and should be done with proper precautions. If you’re not comfortable with heights or power tools, it’s best to hire a qualified roofing contractor for this project. They can typically add vents quickly and correctly. For a DIY enthusiast, adding soffit vents or a gable vent might be manageable from a ladder, but cutting in a ridge vent or roof vent means working on the roof itself and dealing with shingles – it’s not trivial. Also, dealing with electrical wiring for powered fans should involve an electrician or knowledgeable installer to avoid any fire hazards. Remember, while addressing ventilation is important, personal safety is paramount. Professionals have harnesses, proper footwear, and experience walking on potentially steep or hot roofs. At Texas Republic Roofing, we often assist homeowners with ventilation upgrades as either a standalone service or as part of a re-roof. We ensure that all new vents are securely installed, sealed, and integrated with the existing roof system so that it looks clean and works effectively. 7. Post-Installation Check and Maintenance: Once your new or improved ventilation system is in place, it’s important to verify that it’s working as intended. On a hot day after installation, you can enter the attic and notice the difference – it should be markedly cooler than before (though still warm). You might even feel a gentle draft near soffit areas or the ridge. Also, go outside and visually inspect: ridge vent should be flat and unobstructed, soffit vents clear of any debris from installation. Ensure that no exhaust fans (like bathroom vents or dryer vents) were left dumping air into the attic – ideally, those should vent outside through the roof or wall, not into the attic (which would introduce moisture). In the long run, keep your vents clear: periodically (perhaps twice a year when you change HVAC filters) walk around and look at soffit vents – clear off any cobwebs or dust. Peek at ridge vents to see if any leaves got stuck (especially after autumn if you have deciduous trees). If you installed an electric attic fan, test its thermostat by temporarily setting it low to see if the fan kicks on, so you know it works. Listen for any unusual noises from a powered fan that might indicate vibration or a loose mount. These simple check-ups will ensure your system keeps humming along optimally. Generally, passive vents need almost no maintenance beyond keeping them from being blocked (by insulation or dirt). Often, the difference after improving ventilation is immediate and noticeable. Homeowners report their attic is no longer an inferno, their AC cycles less, and any musty smells dissipate. One of our Arlington clients had persistent mild attic mold; after we improved ventilation and they added an attic dehumidifier for a short period, the mold stopped growing and the attic wood dried out. Such outcomes mean a healthier home and one protected from inside-out damage. If you’re not sure where to start or want a professional opinion, Texas Republic Roofing is here to help. We can assess your current ventilation, calculate needs, and recommend the right mix of vents (passive or active) for your specific roof and attic. We’ll then perform the installation with quality and care. Texas heat is tough, but with the right ventilation strategy, your roof can handle it while keeping your home cooler and more comfortable. Protecting Your Texas Home with Proper Ventilation The extreme heat and varied climate of Texas put our roofs to the test. As we’ve seen, roof ventilation is crucial in this environment – it’s the key to a longer-lasting roof, a cooler attic, lower energy bills, and a healthier home. By expelling blistering heat and pervasive humidity from your attic, proper ventilation safeguards everything from your shingles down to your ceiling joists. It prevents the kind of hidden damage that, if ignored, leads to expensive fixes like early roof replacements or mold remediation. Conversely, a well-ventilated roof can save you money and headaches: your shingles avoid heat shock, your A/C gets a reprieve, and your family enjoys a more comfortable indoor climate even on the hottest Texas afternoons. At Texas Republic Roofing, we are passionate about designing and implementing ventilation solutions that give Texas homeowners these peace-of-mind benefits. We know that each home – whether a suburban Arlington two-story with asphalt shingles or a ranch house in the Hill Country with a metal or tile roof – needs a tailored approach to breathe properly. The investment in quality ridge vents, soffit vents, or attic fans is modest compared to the payoff in roof longevity and energy efficiency. When your attic stays closer to the outside temperature and moisture is kept at bay, you’re also creating a healthier environment for your home’s structure (no moldy wood, no overheated materials). It all adds up to a roof that can live out its full expected lifespan and maybe beyond, despite Texas’s harsh heat. In summary, roof ventilation isn’t just about meeting code – it’s about smart homeownership in Texas. From extending roof life and preventing mold to slashing cooling costs and improving comfort, the advantages are overwhelming. If you suspect your attic might be under-ventilated or you’re planning a roofing project, take action. Implement the strategies discussed: evaluate your attic, balance intake and exhaust, consider passive and active vent options as needed, and don’t hesitate to seek expert help for installation. Your roof is one of the biggest investments in your home – giving it the breath of fresh air it needs will ensure it protects you for years to come. For professional guidance and top-quality workmanship, Texas Republic Roofing is ready to assist with all your roofing and ventilation needs. We’ve helped countless Texas homeowners retrofit better ventilation or include it in new roof installations, and we’d be happy to do the same for you. With the right ventilation system in place, your Texas home will be better equipped to beat the heat, season after season. Stay cool, stay energy-efficient, and rest easy knowing your roof is performing at its best under the Texas sun. Roof Ventilation FAQs Q: How can I tell if my attic has enough ventilation or not? A: A quick way is to measure attic temperature and inspect for trouble signs. On a hot afternoon, your attic should be no more than about 20°F hotter than the outside air if ventilation is adequate. If it’s 100°F outside and your attic is 140°F+, that’s a sign of insufficient venting. Also look for the signs we mentioned: any mold or mildew in the attic, rust on nail tips, extremely hot or stuffy air when you open the attic access, or premature shingle curling. In the winter, the absence of ice dams during a freeze (in colder parts of Texas) is a good sign. You can also calculate vent area: add up your intake and exhaust vent areas (in square inches) and see if it meets the 1:150 rule for your attic square footage. If not, you likely need more vents. A professional roofer or home energy auditor can give you a definitive assessment. Texas Republic Roofing offers attic ventilation inspections in Arlington, TX and surrounding areas – we can tell you exactly where you stand and what improvements could be made. Q: What is the best way to ventilate my roof? A: For most pitched roofs in Texas, the best way is a combination of soffit (intake) vents and a ridge (exhaust) vent. This creates a natural flow of air along the entire underside of your roof deck. Cool air enters at the eaves and hot air exits at the peak – it’s efficient and quiet with no moving parts. This setup works well for gable or hip roofs that have a decent ridge length. If a ridge vent isn’t feasible (like on certain hip roofs with short ridges or flat roofs), then a mix of other vents can work: for example, soffit vents plus a few well-placed roof vents or wind turbines near the top of the roof. In some cases, attic fans (solar or electric) are the best solution for forcing airflow, especially in large or complex attics. The “best” solution can vary by house – the goal is always to ensure plenty of intake low and plenty of exhaust high. We often lean towards ridge+soffit as the best passive system. Ultimately, consult with a professional to design a system that suits your home’s design. Texas Republic Roofing can help determine the optimal vent configuration for your specific roof type and size, ensuring maximum effectiveness. Q: Can adding ventilation really lower my cooling bills that much? A: Yes, it can definitely contribute to lower A/C bills – often significantly. By keeping attic temperatures lower, your ceiling and ductwork stay cooler, which means your A/C doesn’t have to overcome as much heat. Studies and DOE data suggest you could see 10-15% savings on cooling costs from good attic ventilation. We’ve had customers report that after adding ridge vents and soffit vents, their second floor was cooler and they were able to raise the thermostat a couple degrees (saving energy) while maintaining comfort. If your attic was extremely hot, the difference can be even larger. However, ventilation is just one part of the equation – proper insulation is also crucial. Ventilation and insulation work hand-in-hand: insulation slows heat transfer, and ventilation removes the heat build-up. So for best results (and lowest bills), ensure you have both adequate insulation (Texas homes often benefit from R-38 or more in the attic) and ventilation. Together, they can dramatically reduce how much your A/C runs. But yes, even by itself, improving ventilation provides a noticeable boost in energy efficiency – and since vents don’t cost anything to run (except powered fans), it’s a one-time upgrade for recurring savings. Q: My roof has turbines. Should I replace them with a ridge vent? A: Turbines (the spinning vent caps often made of galvanized steel) can actually ventilate quite well when the wind blows, but some homeowners don’t like the look or the slight noise they can make. Replacing turbines with a ridge vent is definitely an option and can give a cleaner appearance while providing more continuous venting along the ridge. If you have enough ridge length to vent, a ridge vent can likely equal or exceed the vent area of a couple of turbines. Two 12-inch turbines, for instance, might provide roughly 2-3 square feet of vent area (combined). A 20-foot ridge vent section provides about the same. Key considerations: Do you have soffit vents to feed a ridge vent? Ridge vents rely on soffit intake. If you already have turbines, you probably have some soffit vents – those will work with a ridge vent too. Also, ridge vent works best along a long straight ridge; if your roof sections are small or broken up, turbines or box vents on each section might be better. One more factor is wind patterns – in areas with very little breeze, ridge vent (passive convection) might move air better than turbines which rely on breezes to spin (though turbines do also vent via convection even when still). In general, if you prefer a ridge vent for aesthetic or functional reasons, it’s a solid upgrade. Just be sure to remove/cover the turbine holes properly and not mix them (don’t leave turbines and add ridge – choose one system). Texas Republic Roofing can certainly replace old turbines with ridge venting when doing a re-roof or as a standalone job, and we’ll ensure your intake vents are adequate at the same time. Q: How often should I check or maintain my roof vents? A: The good news is that passive vents require very little maintenance. We recommend doing a quick check twice a year (perhaps spring and fall). What to do: go around and look at all visible vents – make sure soffit vents aren’t clogged by dust, paint, or spider webs. You can gently brush them or vacuum them if reachable. For ridge vents, make sure no debris like leaves or pine needles are accumulated along the ridge. If you have trees, sometimes a twig or leaves can get stuck in the external baffle – just clear them off with a broom or leaf blower (carefully). Gable vents can be visually checked for nests (birds sometimes try to nest behind gable vents – mesh hardware cloth can deter that). If you have an attic fan, you should test it at the start of each hot season: either via its thermostat or a manual switch if it has one. Listen to ensure it runs smoothly (no squealing bearings). Many electric fans have motor oil ports; a couple drops of oil annually can extend motor life. Solar fans generally don’t need anything except keeping the solar panel clean – wipe off heavy dust or pollen once a year so it can get full power. Also, after any severe storm (especially wind-driven rain), it’s wise to glance in the attic for any signs of water intrusion around vents – a properly installed vent shouldn’t leak, but extreme sideways rain can sometimes infiltrate if vents were not installed with baffles. If you ever spot a small leak stain around a vent, call a roofer to address the flashing or caulking. But routine maintenance is minimal. In summary: inspect and clear vents biannually, and keep an ear out for any changes (like a fan not coming on when it should). With these simple steps, your ventilation system will remain effective for the life of your roof. Call to Action: Don’t let the Texas heat cook your roof and drive up your energy bills. Ensure your attic is properly ventilated with help from the experts at Texas Republic Roofing. Serving Arlington, TX and the surrounding communities, we offer inspections and ventilation upgrades tailored to your home’s needs. Whether you need ridge vents installed, soffit vents added, or an attic fan set up, our experienced team has you covered. Contact us today to schedule an evaluation of your roof ventilation – and take the first step toward a cooler, longer-lasting roof and a more comfortable home!